If you have a roofing project, Ethylene Polypropylene Diene Monomer (EPDM) could be the perfect solution for you.
This material can withstand wind, rain, sun, and other elements for at least 25 years and sometimes more than 50. It is quick and simple to install and requires very little maintenance once it's in place.
Learn more about this cost-effective, efficient roofing option right here.
What is EPDM?
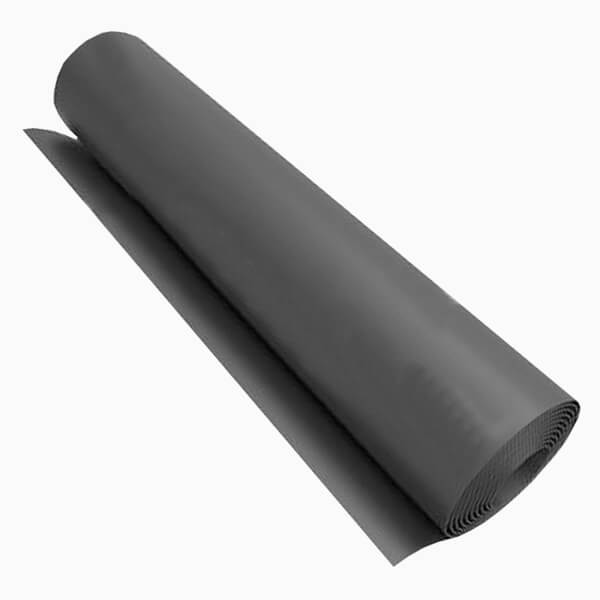
Ethylene Polypropylene Diene Monomer is a type of synthetic rubber primarily made of ethylene and propylene, which are themselves derived from oil and natural gas. The material is incredibly versatile, with multiple applications, including insulating seals for freezer and refrigerator doors, seals on various areas of motor cars, speaker cone surrounds, and even solar panel heat collectors.
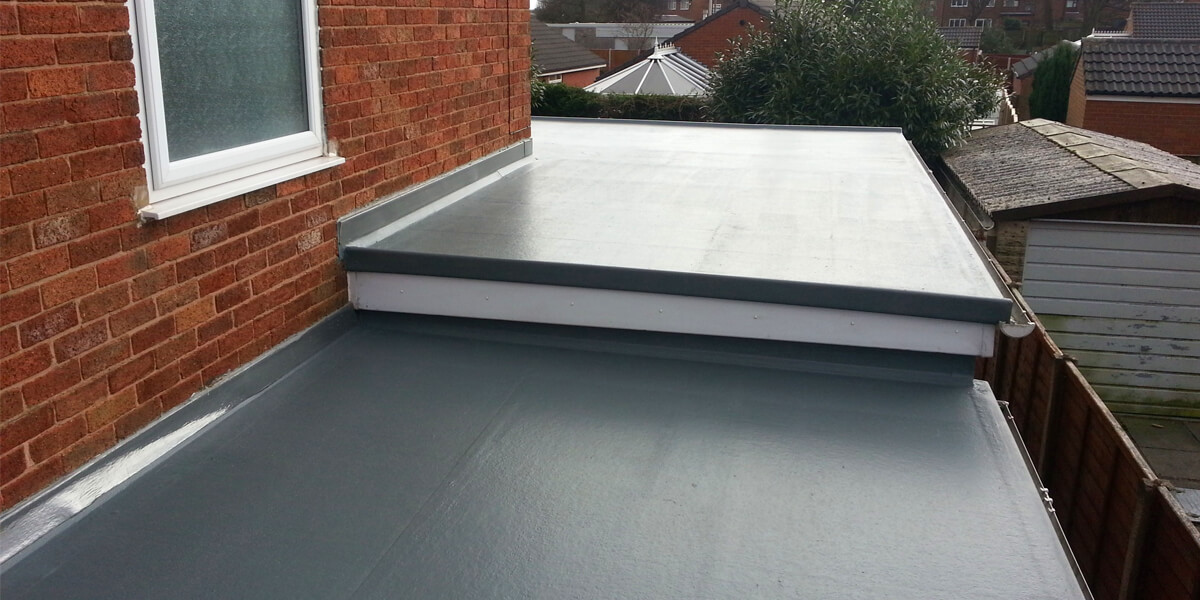
As a roofing solution, EPDM is especially suited to flat roofs and is popular in industrial and commercial settings. Compared with felt, it's easier to apply and not that much more expensive. Glass Reinforced Plastic (GRP) roofing is also trickier to apply and more expensive. Homeowners often choose GRP because of its appearance, but EPDM is also attractive and creates a pleasing finish to projects.
In addition to its capacity to withstand extreme weather and low maintenance demands, EPDM is tear-resistant and has good insulation properties. All these factors contribute to the rubber's long lifespan and make it an ideal option for almost any roof. The fact that it is relatively simple to install doesn't hurt, either.
Buying EPDM Roofing
Once you've decided that EPDM is the right roofing material for you, rather than GRP or felt, it's time to buy what you need – from Buildworld, of course. We offer the best-quality EPDM at highly competitive prices, which you can check out in our online store.
The exact cost of your rubber depends on your specific roof's type and total surface area. For example, if you're overlaying an existing roof, you'll use more EPDM than if you're installing a full replacement.
You don't only need to purchase the roofing, but also any other materials you'll need. This includes the roof deck timber you'll be using, and it's very important to choose the right type. When you fit a single-piece roof, you usually need to glue it into place, so plywood or OSB sterling board are your best bets for bases here.
Preparing Your Surface
Before you lay your newly purchased EPDM, you need to make sure that the surface you'll be laying it on is free of dust, clean and completely dry. Dust particles can prevent the glue from bonding properly, creating bubbles in your final result.
In addition, bitumen could damage the rubber membrane, and residual moisture can get trapped beneath the rubber, which can have a negative impact on its overall longevity and performance. The take-home message here is don't cut corners when prepping your surface.
Laying and Relaxing the Membrane
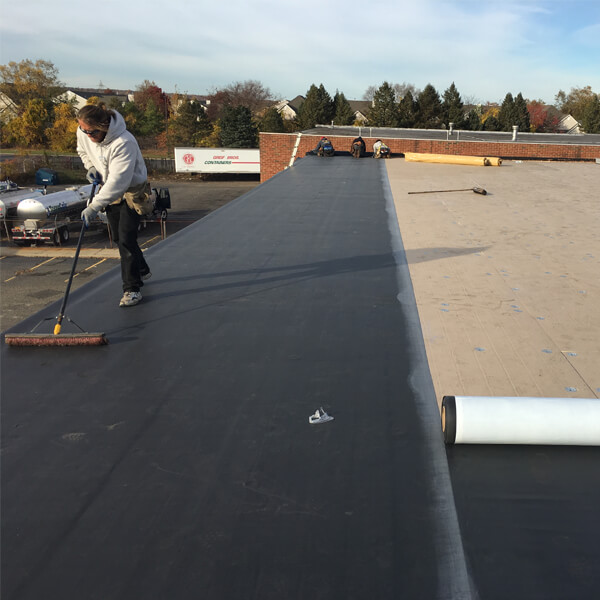
To ensure a high-quality finish, you need to prepare the EPDM membrane by laying and relaxing it. Often, your rubber will arrive tightly packed. You'll need to unfold it, taking care that it doesn't get dirty, and lay it out to relax in position on your roof for 20 minutes to half an hour. This gives it time to expand and then contract back to a neutral state and helps ensure a smooth surface that doesn't run the risk of ponding water in the future.
Fitting EPDM Roofing

When you're sure that your membrane is thoroughly relaxed and is back in its neutral state, you can cut and trim it to a workable size. This makes the sheets a lot easier to work with, but you need to think carefully before you actually start cutting.
Remember, once you've made an incision, there's no way to undo it!
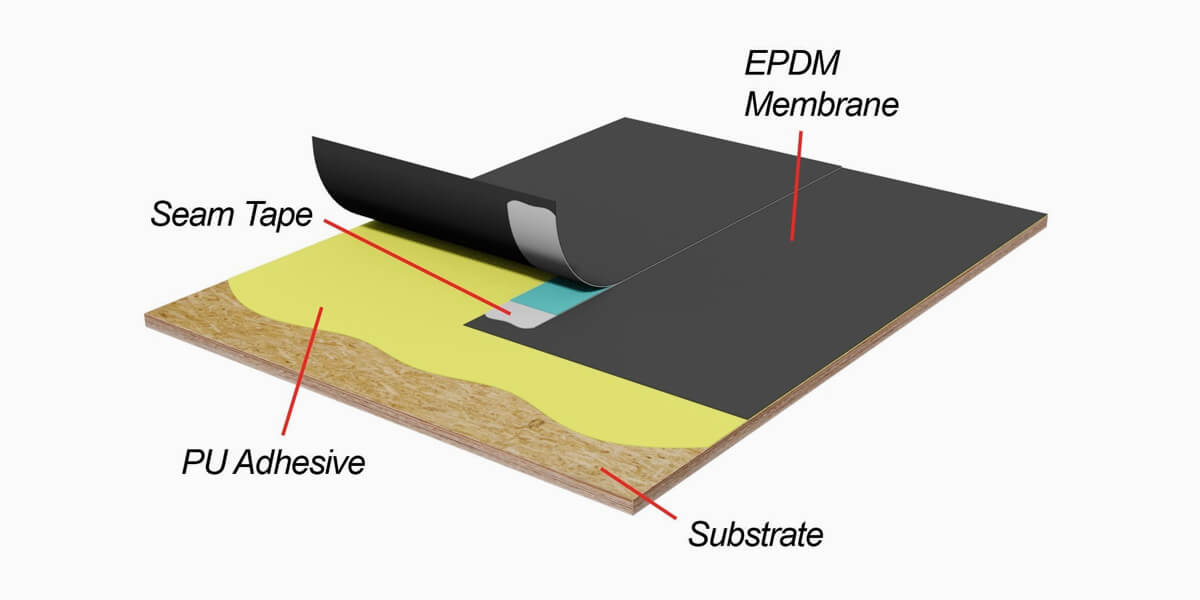
Decide on the pattern you want to cut and use sharp scissors to begin with. When you have the basic pieces, finish the task by going around the edges with a sharp Stanley knife, for a precision finish to the job. Your next step is actually glueing the rubber down, which is a two-stage process.
First, apply a water-based adhesive to your roof decking area in an even coat. Fold back half of your membrane, and then apply your adhesive layer. While painting the glue onto the decking, make sure that you keep it about 150mm from the roof's edges; this is where the contact adhesive will be applied later.
When all the adhesive has been painted on, roll the membrane from the middle outwards, back into its original position as you brush it firmly onto the glue with a soft-bristled brush. Then, repeat the process for the other side of the sheet.
The second stage of the glueing procedure involves a much stronger adhesive. Here, you'll be focusing on details and edges. The glue keeps corners, edges and difficult details firmly in place so that the rubber doesn't move or lift in bad weather.
Apply the contact adhesive to both surfaces and wait for it to become dry to the touch before glueing the membrane and the laying surface together. Then seal the glued membrane into place – a silicone roller is ideal for this job.
All the Trimmings
Finally, you're ready to trim your EPDM project. Choosing the right trimming is important from both an aesthetic and a functional point of view. You need to be sure that the edge trim you choose can keep water on the roof and guide it towards a drip trim, so that the water can drip off the roof and fall into a gutter.
The three options when it comes to EPDM edge trim styles are:
- Metal
- Kerb
- Plastic
All 3 are functional and work well, and deciding on an edge trim is a matter of personal taste. Think about what you'd most like to see on your finished roof and choose the same drip trim style for a consistent look.
You'll also need to fit your new EPDM rubber roof over the flashings, which is where the roof abuts brickwork walls. You can use plastic-coated metal flashing strips, often called wall trims, or universal metal gutter drip trims. The trims are chased into the brickwork mortar, and typically sit 150mm above the deck.
EPDM Roof Maintenance

You don't need to do a lot of EPDM roof maintenance, but you should keep it clean and conduct frequent inspections to keep it in tip-top condition. You can sweep or hose off any loose debris or dirt and should also apply rubber roof cleaner on a regular basis.
Work in small areas when applying the cleaner, rubbing the solution on the roof in circular motions with a mop or a soft brush. Rinse the area well afterwards, to remove any dirt residue on the membrane. While you're cleaning, conduct a visual check for punctures and tears, and finish off with a thorough inspection of the gutters and drains.
How to Handle Common EPDM Problems
No area of a building and no material is without issues, so you may run into hiccups with your EPDM roofing. If you install the rubber properly, these should be kept to a minimum, but if they do occur, you should act as quickly as possible. We've got advice on how to handle the most common EPDM problems:
- Bubbles and Blisters: Vapours from bonding adhesives can become trapped, and expanding air can gather in the roof structure, h of which can form bubbles and blisters in your EPDM roof. The rubber won't fail, but the appearance on your flat roof might bother you. The best course of action is usually to leave them alone, but if the membrane looks damaged or the bubbles are along a seam, call in a specialist.
- Holes and Leakage: Shrinkage, holes and membrane punctures can all cause leaks to develop. Thorough cleaning and regular pections usually prevent leaks; if they occur, you'll probably be able to patch and repair them.
- Patches and Repairs: Get hold of a patch repair kit from Buildworld, and make sure the area you need to fix is free of risk and 100% clean. Before you start patching, use your EPDM roof cleaner. This helps ensure that the patch sticks properly to the membrane. Measure the patch, leaving at least 50mm of membrane outside the perimeter of the damaged area. Round off any corners, and apply the patch according to the instructions on the kit. A bead will appear when the seam is properly bonded, so check for this to make sure that the patch is fully sealed.
- Shrinkage: Shrinkage is usually due to insufficient time spent laying and relaxing the rubber before installing it. The problem could also be due to poor adherence at an angle and perimeter changes. If this happens to your roof, you should consult a skilled professional about the best course of action.
Finally, remember that our knowledgeable Buildworld staff are available to help in any way we can. If you need advice on laying, maintaining or fixing your EPDM roof, or on any other DIY matters, don't hesitate to call on us!
Related Articles
Category
Doors & WindowsPosted On
23rd January 2025