
Loft rooms can be dark, dismal places that can seem smaller than they really are due to the lack of natural light and the roof’s pitch. You can make all the difference to the room by installing a Velux window – and do not worry if your roof is tiled, because the project is a relatively simple one.
Our handy guide lists the basic tools you will need and includes a step-by-step process for fitting a Velux window to a tiled roof. Before you start work, ensure that you meet your local building requirements and that you have the relevant permissions from your local council. You can find the perfect Velux window for your loft room, as well as all the tools you need, at Buildworld.
Tools For The Job

Preparing the Velux Window
You will need a Velux flashing kit your tools and the window you want to install on your tiled roof. Make sure you have everything you need before you start working.
Follow these steps to prepare your new window for installation:
1. Unbox your window by laying the box flat on a table or on the floor, pressing the tabs, and pulling the box out. Do this carefully to avoid damaging the various parts of the window.
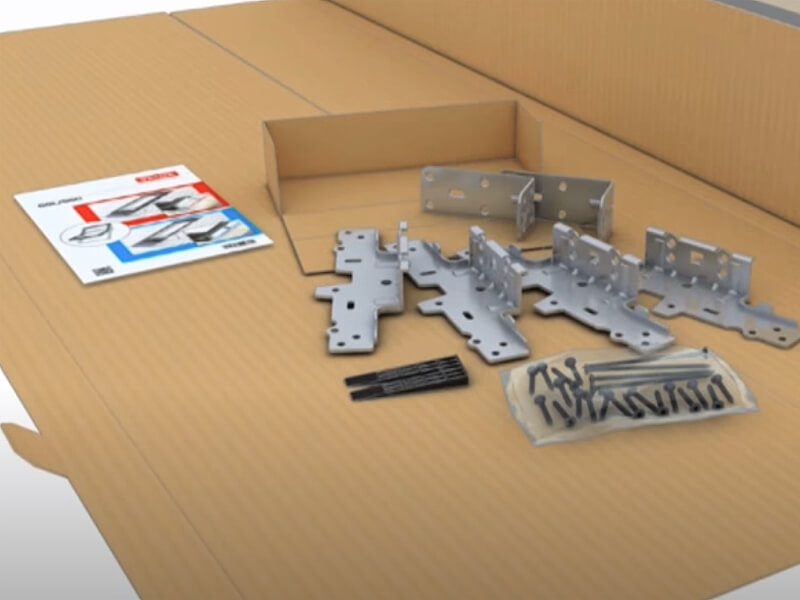
2. Remove the window, the hood, the box with the brackets and other parts, and the instruction booklet.

3. Place the window in an upright position and remove the pieces of polystyrene at the top of it. If your window is a centre pivot, open the window, remove the polystyrene blocks from the control bar, and put them on the sash. Turn the sash so those blocks are on the floor, and then use the button on the hinges to remove the sash from the frame. Put it in a safe place while you work.
Creating an Opening For the Window
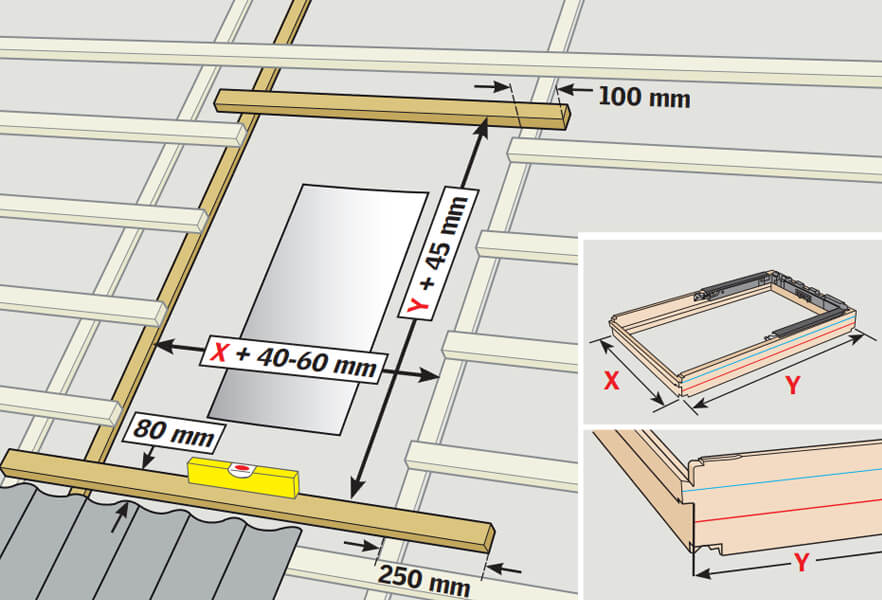
1. Use the carpenter's square and a pencil to mark the area where you will install the Velux window. Be sure to mark the centre of that area as well. The opening you create should be 40mm to 60mm wider than the new window.
2. Working from the centre, remove the battens or felt to expose the tiles and other roofing materials.
3. Remove the tiles by lifting them and pulling them back between the rafters. Make sure you create a clear gap for the window, and that it is slightly wider than the actual window, as mentioned above.
Fitting the Installation Battens
1. When you have finished creating the opening for the Velux window, fit the lower installation batten. You will need to position it so that the first row of tiles below the window is 80mm from the batten's top edge. Use the spirit level to check that the batten is level.
2. Use the tape measure or ruler to measure the length of the window upwards from the top edge of the lower installation batten, and then add 45mm, and mark that spot. Fit the upper installation batten there.
3. Check that the upper batten overlaps the opening width by 100mm and that the lower batten overlaps the opening width by 250mm.
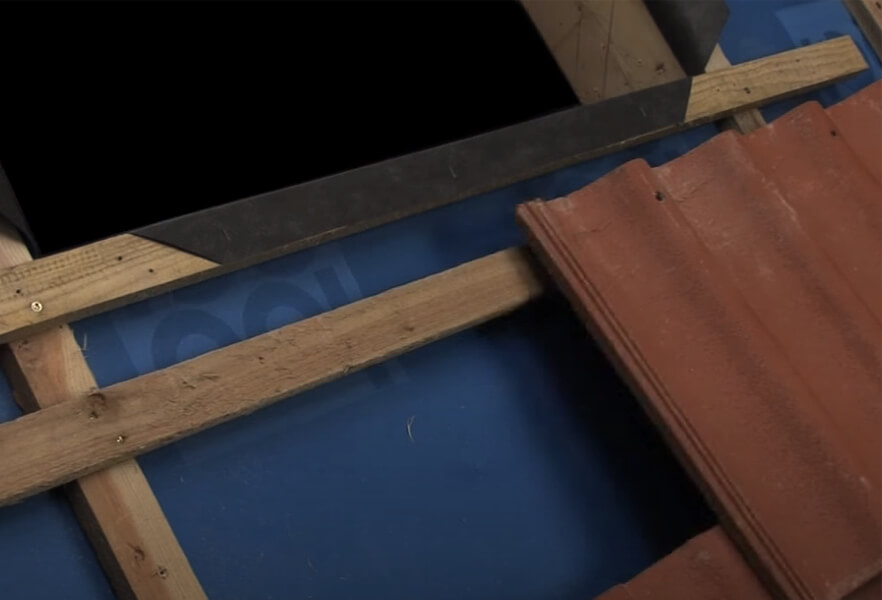
4. Use the utility knife to cut away excess felt. You can place those cut-offs over the battens for additional waterproofing. When that is done, remove the tiles below the opening you created for the window.
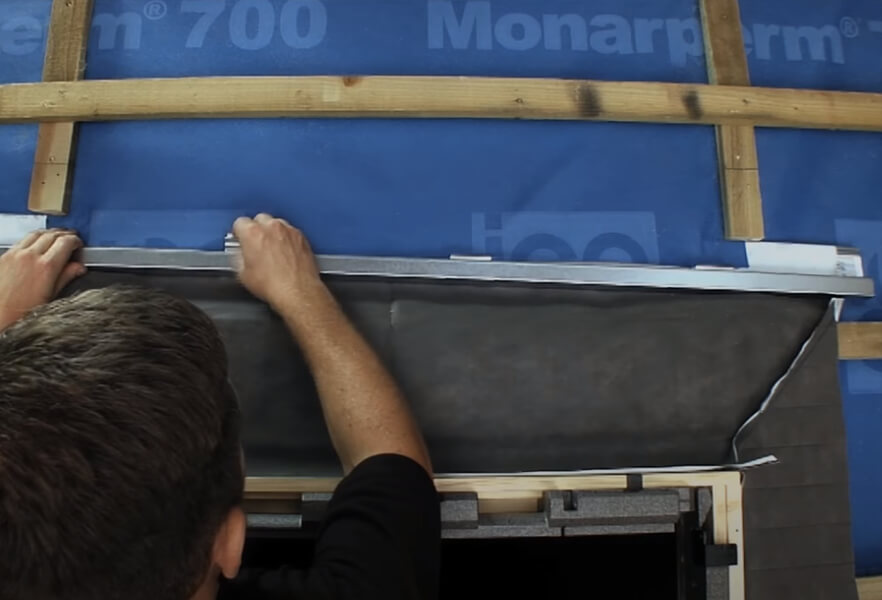
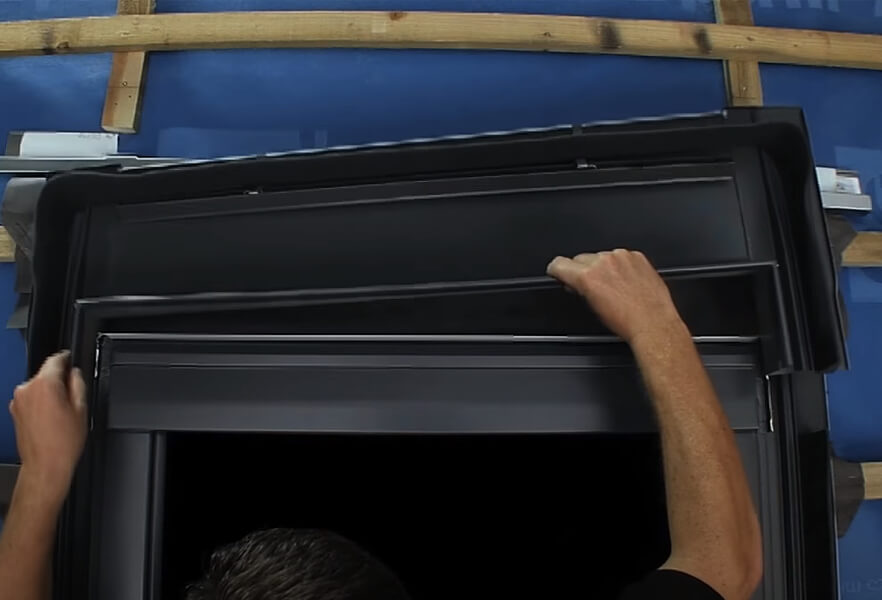
Installing the Window Frame
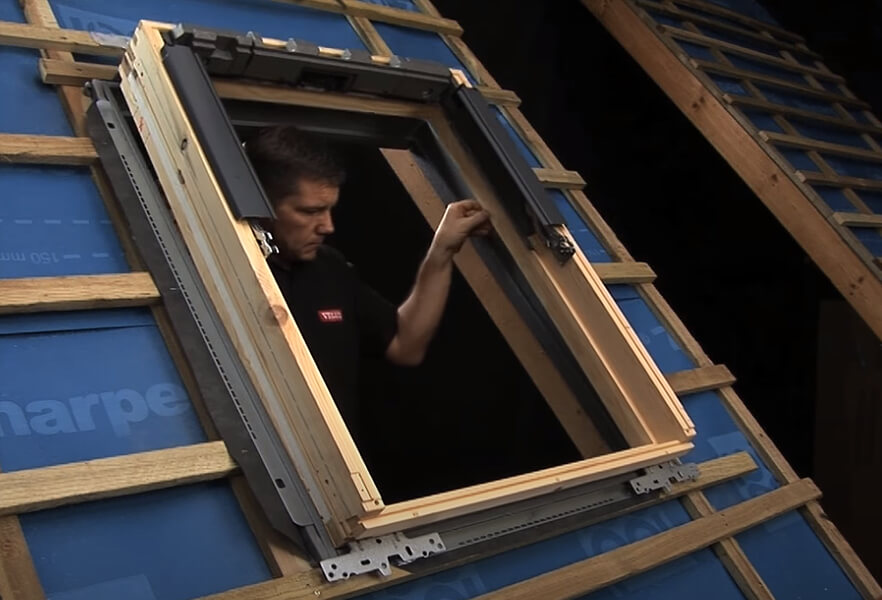
1. Start installing the Velux window frame by fitting the insulation collar. Do this by clipping the collar's corners together and then positioning it in the space you created.
2. Refer to the instructions that came with the fitting and use them to attach the brackets to the window. Place the brackets over the pilot holes, and once they are attached securely, position the frame over the opening in your roof.
3. Start fixing the frame in place by using screws and a screwdriver to attach the frame's bottom brackets to the lower batten. Use 30mm and 80mm screws, and make sure that they go through the batten and counter batten. If you are able to get the screws into a rafter, do so. Use 30mm screws in the top brackets, but do not screw them in completely. Leave them with about 10mm out.
Installing the Window
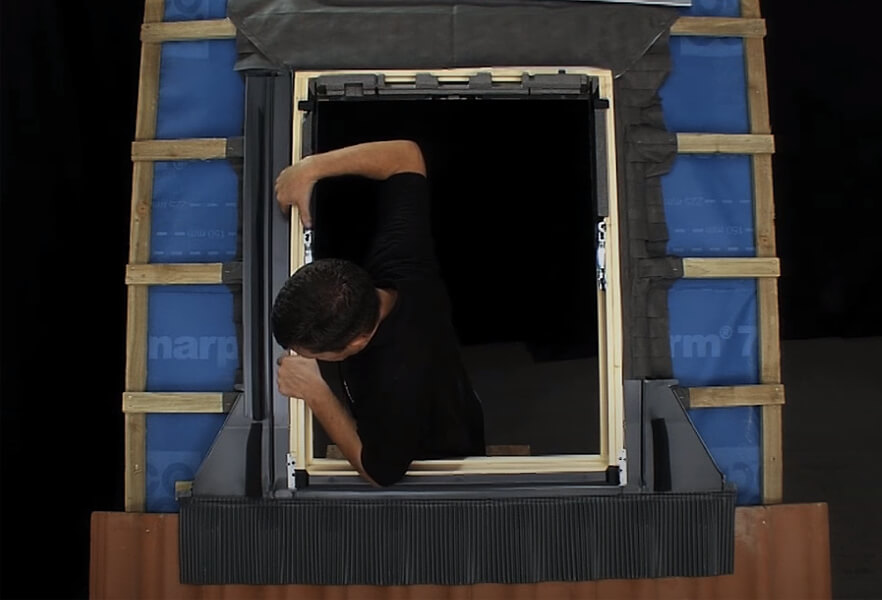
1. Replace the sash in the frame by lining up the sash's curved hinge with the slots on the frame. Check that the gap between the sash's sides and the frame is even. If it is wider at the top than at the bottom, use a crowbar to pull the edge of the frame until the gap is even.
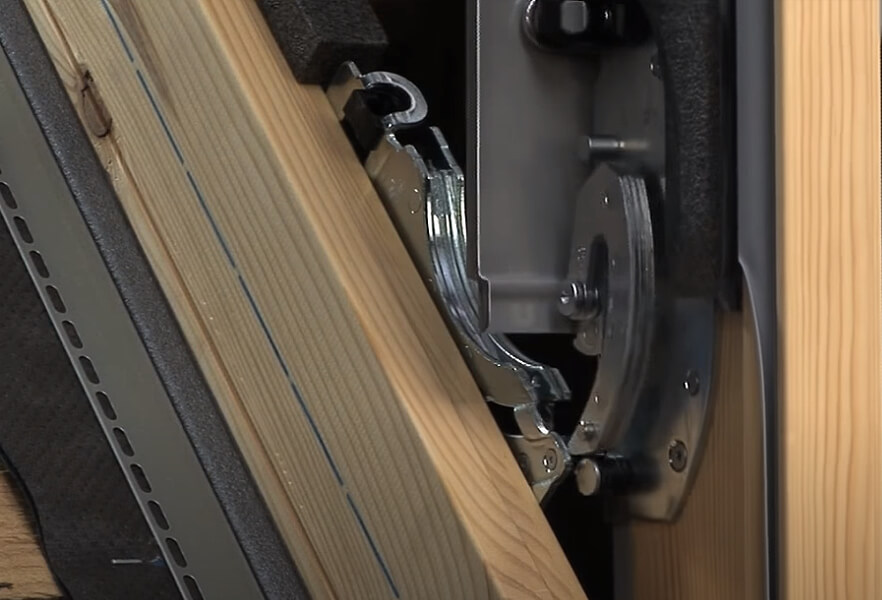
2. Open the window and check that the gap between the sash and the frame is even. If not, place the black wedge from the flashing kit and put it in the upper bracket opposite the side with the wider gap.
3. When you are happy with the adjustments you made, remove the sash again, and then screw in the remaining 10mm of the upper 30mm screws. Reinforce the upper brackets by screwing in 80mm screws. They should enter the battens and a rafter.
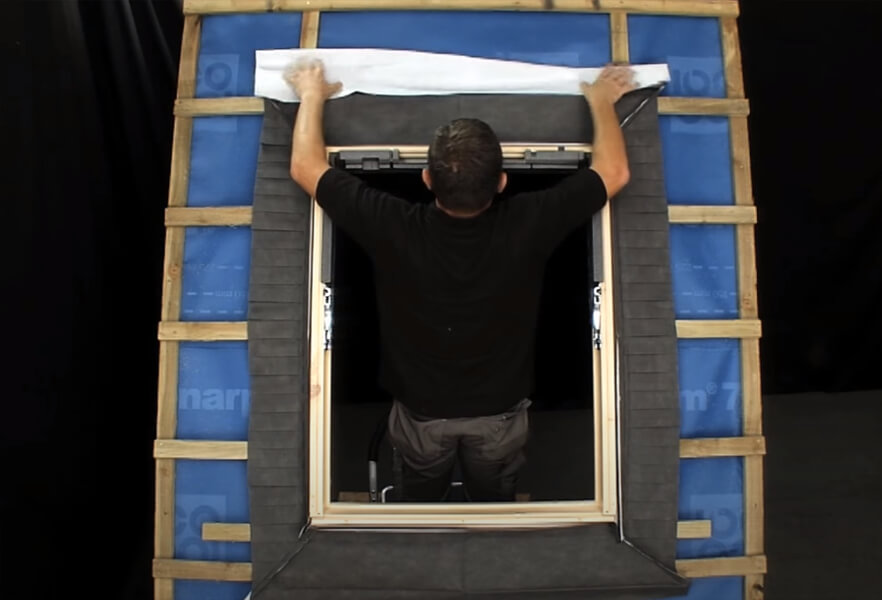
4. Attach the underfelt collar by marking the transverse gutter's position. Remove part of the counter batten if need be. After cutting a flap in the felt and adding sealant, you can position the collar around the frame. Stick the collar to the frame's edges, and then staple it around the battens. You can fit it around counter battens by making cuts where necessary.
5. Attach the gutter and fold the underfelt collar into the gutter. Use the utility knife to cut away excess material, and then secure the flap with clips from the kit.
Installing the Flashing Kit
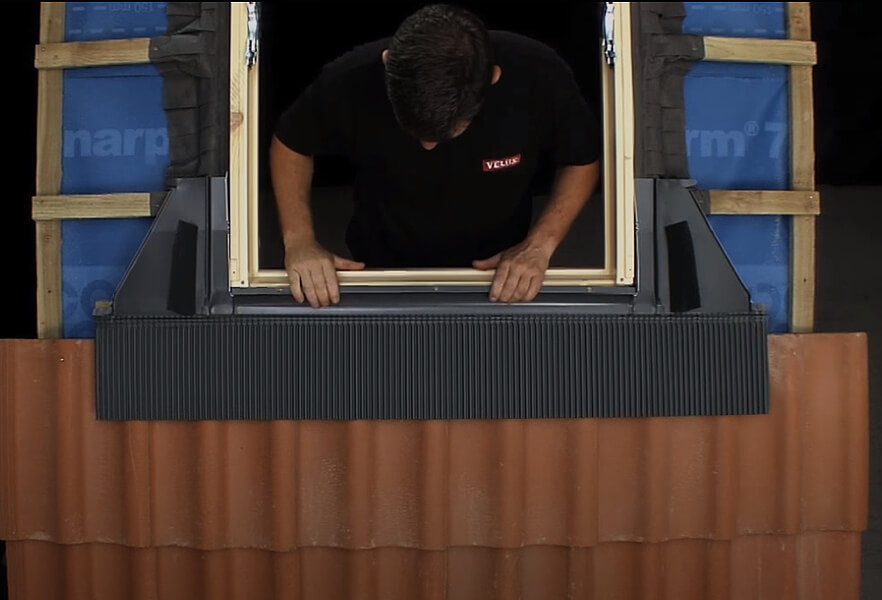
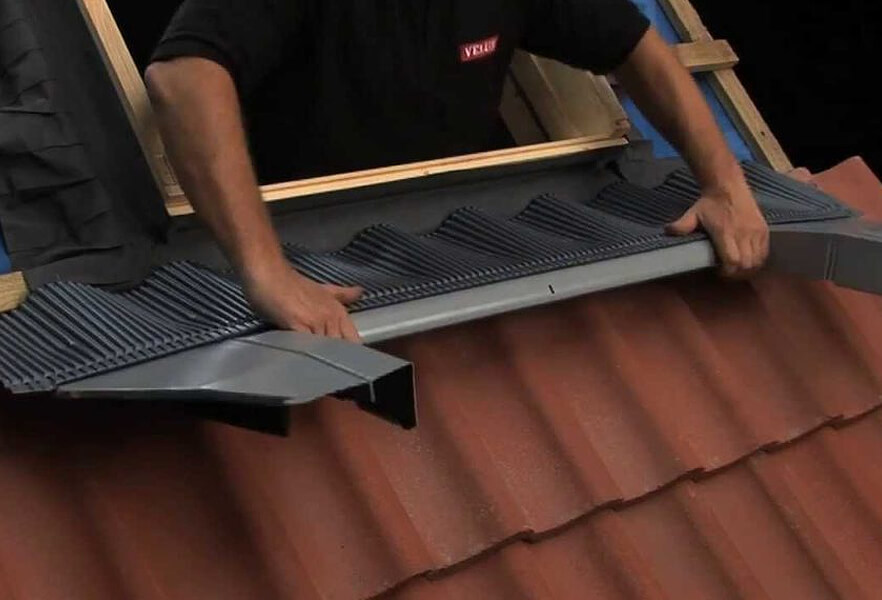
1. If you have profiled tiles, chamfer them so that their highest point is 130mm below the bottom of the window.

2. Install the apron flashing by positioning the bottom section in position and shaping it over the tiles. Give it a snug fit by bending the pleats back by 45 degrees, repositioning it, and screwing it to the side of the frame.
3. Install the side flashing by sliding them into position and then using the tabs to attach them. Do this by folding the tabs and nailing them into place. Remove the part 5 flashing parts.
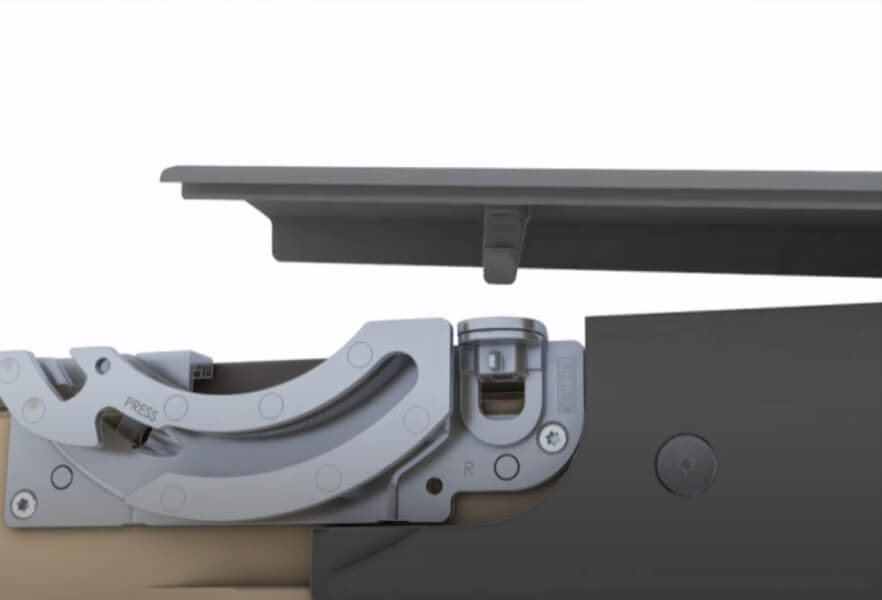
4. Install the side frame covers by clicking them into place and then sliding the part 5 flashing parts back into their slot. Make sure you hear them click into place.
5. Use screws and a screwdriver to attach the hood section, and then put the piece of top flashing into position. Use the tabs to attach it by folding them down on both sides of the window.
Installing Tiling and Vapour Barrier
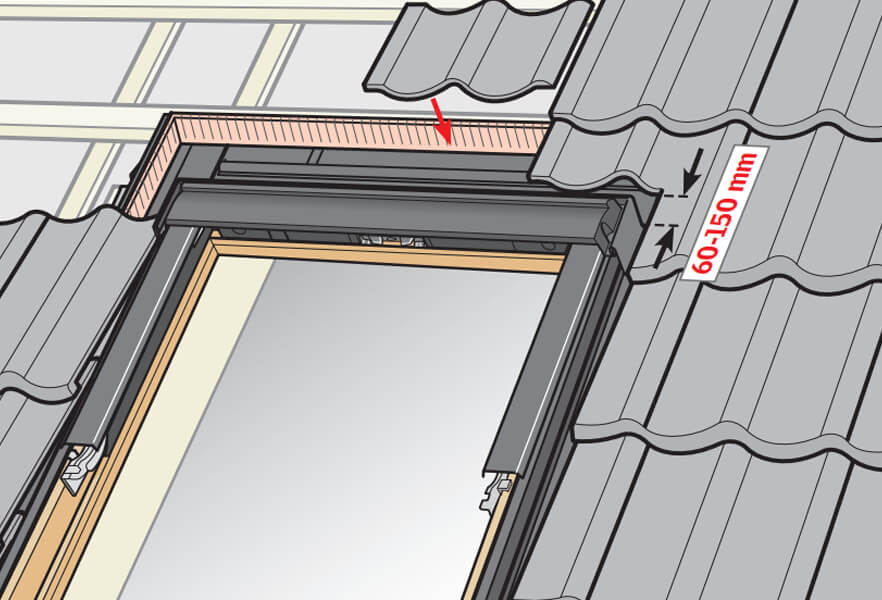
1. Finish tiling around the window after installing the flashing. Use the utility knife to cut the foam gasket on the side and top to fit the place where the tiles meet. Leave a 60mm – 150mm gap between the top of the window and the tile for rainwater drainage. You may need to use an angle grinder to cut tiles to fit.
2. Install the vapour barrier by using the tool in the kit to fit it into the window's internal lining rebate. Attach it with screws in each corner. Use tape to attach it to the existing vapour barrier.
Your Velux window should now be successfully fitted, making your home brighter, lighter and all the more attractive.
Related Articles


Category
Sealants & AdhesivesPosted On
6th October 2021

