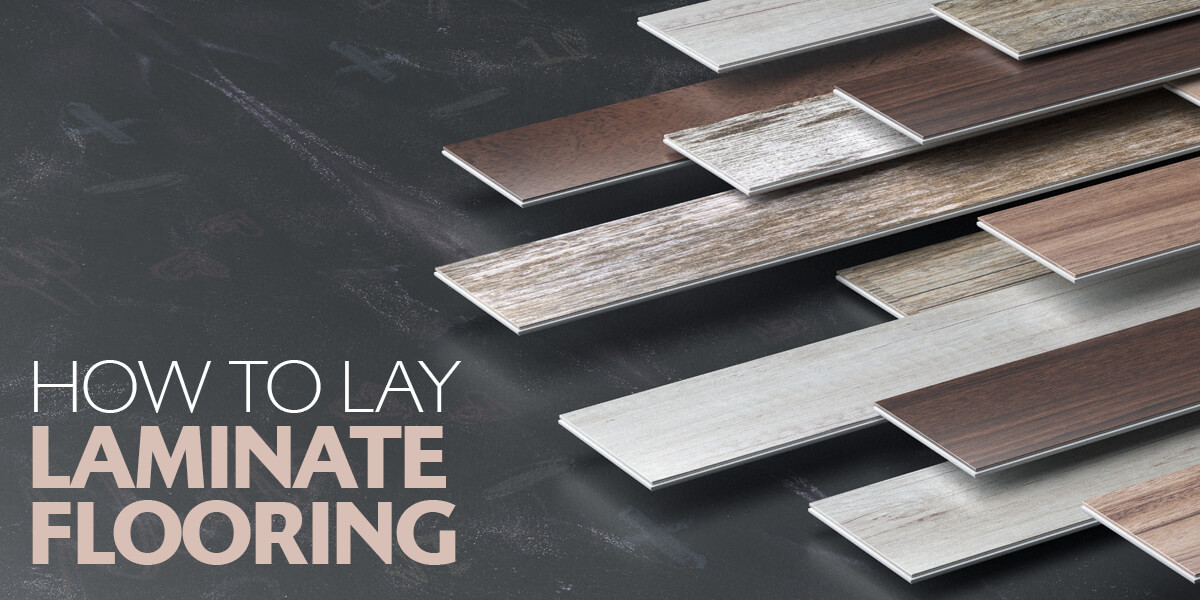
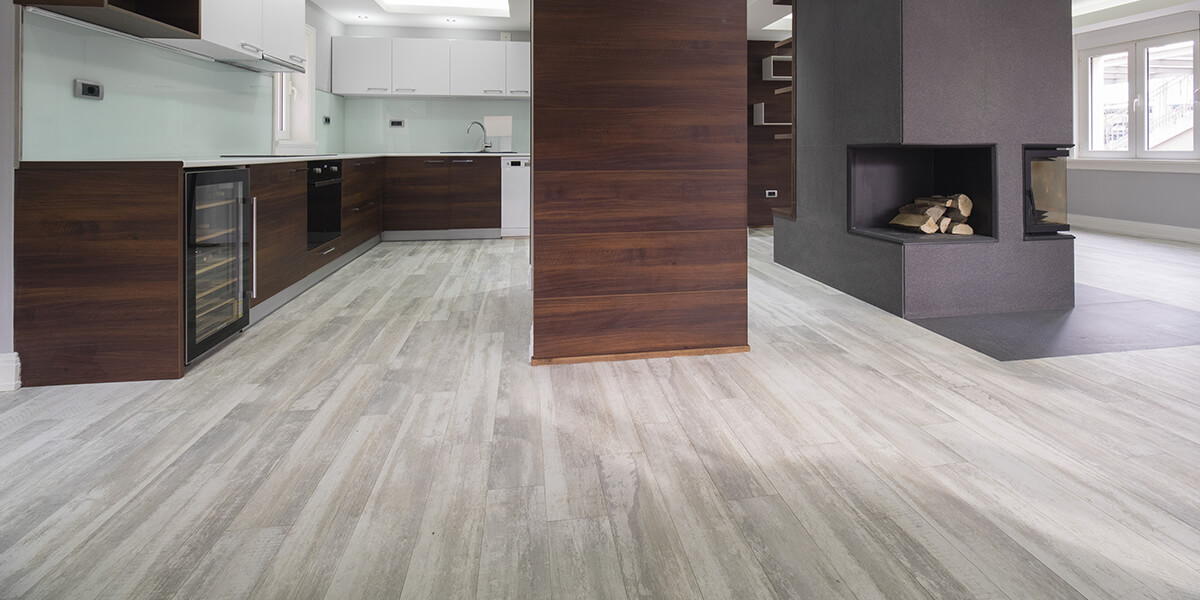
Laminate flooring is a synthetic product made of multiple layers fused together. It simulates wood flooring with a photographic layer underneath a clear, protective one. Usually, the inner, core sheet is made of melamine resin and fibre.
Since it arrived on the market in the 1970s as a cheaper alternative to real wood, today's laminate manufacturers have come a long way. This means you can use products of great quality for a competitive price and choose from dozens of different types of wood.
You'll be able to find sophisticated ash, exotic bamboo, rich cherry, deep mahogany, warm maple, old-fashioned oak, and dramatic walnut, to name just a few. If you want a contemporary look, you've got it, but there are rustic, antiquated versions of these woods, too, for a worn-in appearance.
All of this variety is possible thanks to the photographic process that is used to create the design layer of laminate flooring. It's a high-resolution image of the wood in question, so it's remarkably realistic. The image is printed and then glued onto a core of fibreboard and then backed by an additional layer at the bottom, treated to prevent damage from moisture. The whole thing is then covered by a resistant, clear top layer that keeps the picture perfect.
If you're keen on fitting laminate flooring in your house but are concerned about the costs, don't worry. Doing the installation yourself can save you a lot of money on fitters' fees, and it's a lot easier than you may have imagined!
This Guide at a Glance
We've covered all the steps you need to take when laying your laminate flooring, not omitting planning and aftercare.
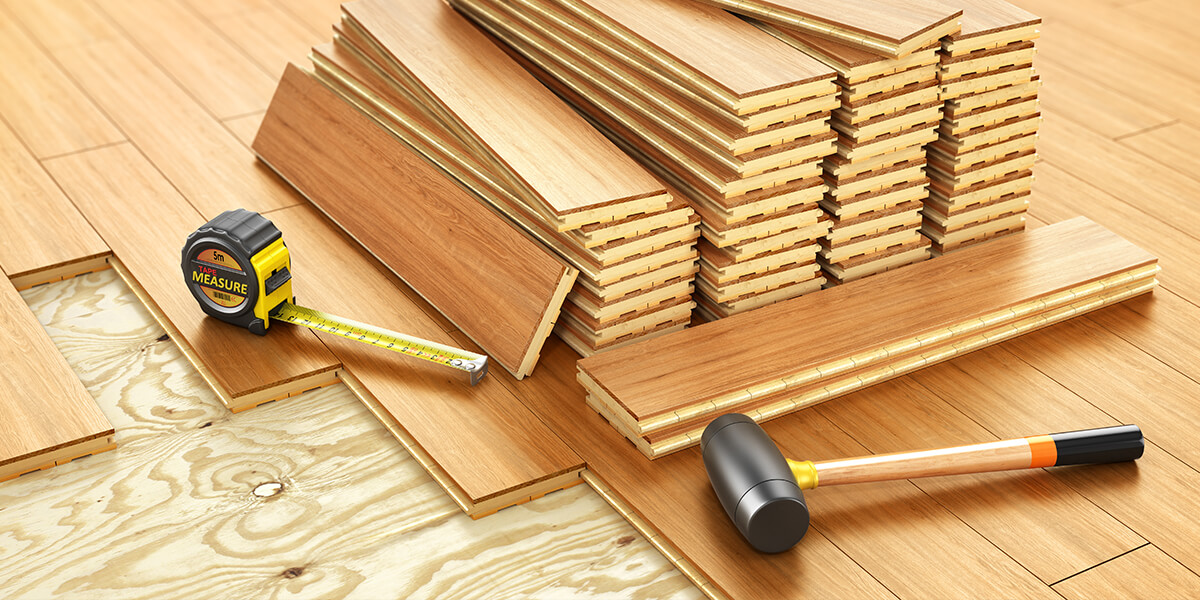
1. The Tools and Materials You'll Need
Ask anyone with a little DIY experience about gathering the right tools and materials, and they'll all tell you that it's crucial that you do this first. We have learned this the hard way and cannot overstress the importance of starting with everything you need within reach. Don't try to find a quick fix. This will only result in a shoddy job and may well lead to serious problems occurring down the line.
Here's what you're going to need before you begin laying your laminate flooring:
- Calculator
- Chisel
- Circular Saw
- Clamps
- Door Threshold or Profile
- Dust Mask
- Earmuffs
- Flooring Spacers
- Hammer
- Handsaw or Jigsaw
- Knee Pads
- Laminate Flooring
- Mitre Box
- Nails
- Panel Pins
- Pencil
- Drill Bit
- Pull Bar
- Radiator Rings
- Ruler
- Safety Goggles
- Set Square
- Scotia or Beading
- String Line
- Tape Measure
- Tapping Block
- Underlay
- Wood Glue
- Workbench
2. Staying Safe
Before you start any sort of home improvement project, it's crucial that you take all the necessary precautions to ensure an accident-free zone. You're going to need:
Dust Mask

Fine debris is a simple fact of life with the saws you're going to be using to cut the laminate planks. Having a dust mask is essential to ensure you don't breathe in harmful materials.
Earmuffs

Cutting laminate is a noisy job.
knee Pads
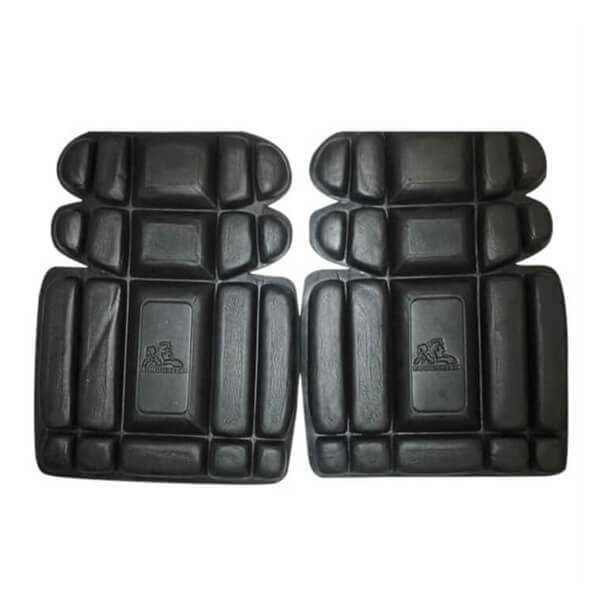
You will be spending a lot of time on the floor with this project, so you'll be very grateful for knee pads a couple of days in! This is even more true if you are fitting the laminate flooring in big rooms.
Safety Goggles

Safety goggles protect your eyes and are especially necessary when you're cutting your laminate to size, laying the planks and fitting your edging.
3. Make Sure Your Room is Suitable
Before you start the fitting or even the purchasing process, you're going to need to check that laminate flooring will work in the room you want it in. As versatile as it is, there are certain considerations to be taken into account.
Laminate Flooring in the Home
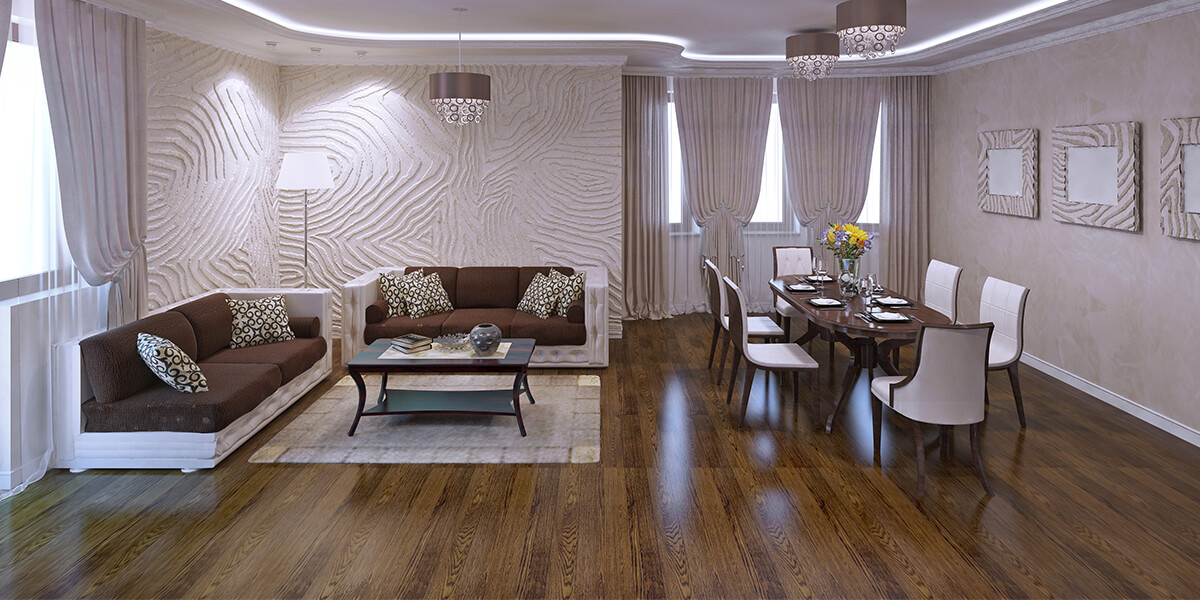
Although it's possible to laminate the floors of most of the rooms in your house, those with high moisture levels should be treated with caution. While it's simple enough to give your bedroom, conservatory, hallway, and living areas this treatment, give careful thought to using this type of flooring in your bathroom or kitchen.
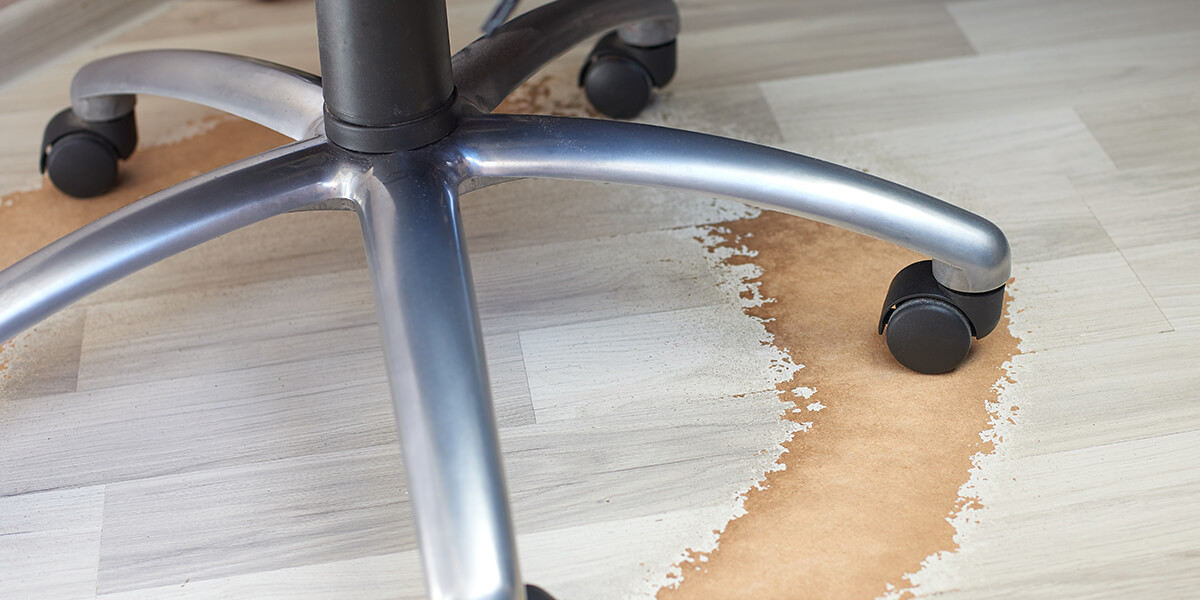
Although laminate is water-resistant, it is not waterproof, and prolonged exposure and large spillages can damage it irreparably.
Laminate works fine with underfloor heating as long as you keep temperatures below 27°C. Anything above this can affect the material. However, it's the perfect choice for high-traffic areas in your home, thanks to its durability. Its high-density fibreboard core adds strength, as does the scratch-proof protective wear layer.
Laminate Flooring in Commercial Spaces
If you're laying laminate flooring in a business environment, like that of a shop floor, you will need to ensure it has a high Abrasion Class rating. This describes how durable it is, and the rating is only given after the material has passed a series of rigorous tests.
We recommend a grade of either AC4 or AC5. The higher the grade, the more suitable it is for heavy foot traffic. So, AC4-grade laminate is good for offices, and AC5 is more suited to big department stores and public buildings.
4. Measuring

Laminate flooring comes in packs, so you will need to know how much you need in square metres. This means you will need two measurements, one of the longest parts of the room and one of the widest. Don't neglect alcoves or windows and include halfway into your door frame in your calculation.
PRO TIP: Remember, not all rooms are symmetrical. To deal with this, take two measurements and use the larger one. This will improve your accuracy when you order your new flooring.
Now you'll have two measurements, and for our example, we'll say the length is 5 metres and the width is 4.5 metres. Thus, the area of the room will be 22.5m²; these totals multiplied together. Always allow for a certain amount of wastage to be safe; 10% extra should do the trick. Just multiply your square metre total by 1.2, giving you, in our example, 24.75m². Now you've got the area size of the room, so the next question is how much of your chosen flooring you're going to need.
All laminate flooring product pages have this information. Alongside plank dimensions, you'll be able to see the size of the pack in square metres. To work out how many packs you need, divide your room area by the pack size and then round things up to the nearest whole number.
If we use our example and add a pack of laminate flooring measuring 2.39m², the sum would look like this:
24.75 ÷ 2.39 = 10.3
Rounding up to the nearest whole number will take us to 11, so that's how many packs we'd order.
5. Preparing
Certain laminate flooring features a click-lock system for installation, and others a tongue and groove technique, so make sure you check this before you begin.
Getting Your Subfloor Ready
Removing Old Flooring

You'll need to take out existing carpets and tiles. When you lay your laminate floor, you'll require a level surface to work on that is clean and has been cleared of all debris. This is a very important part of this DIY project because it will directly affect the lifespan of your new flooring.
Repairing Your Subfloor
If your subfloor has an uneven surface, laying laminate directly over it will damage your boards over time because of the extra pressure. A flat subfloor will increase your laminate's longevity, so you'll have to see to this before anything. There are many guides and How-Tos available online that will help you repair damaged concrete and wood subfloors.
Cleaning
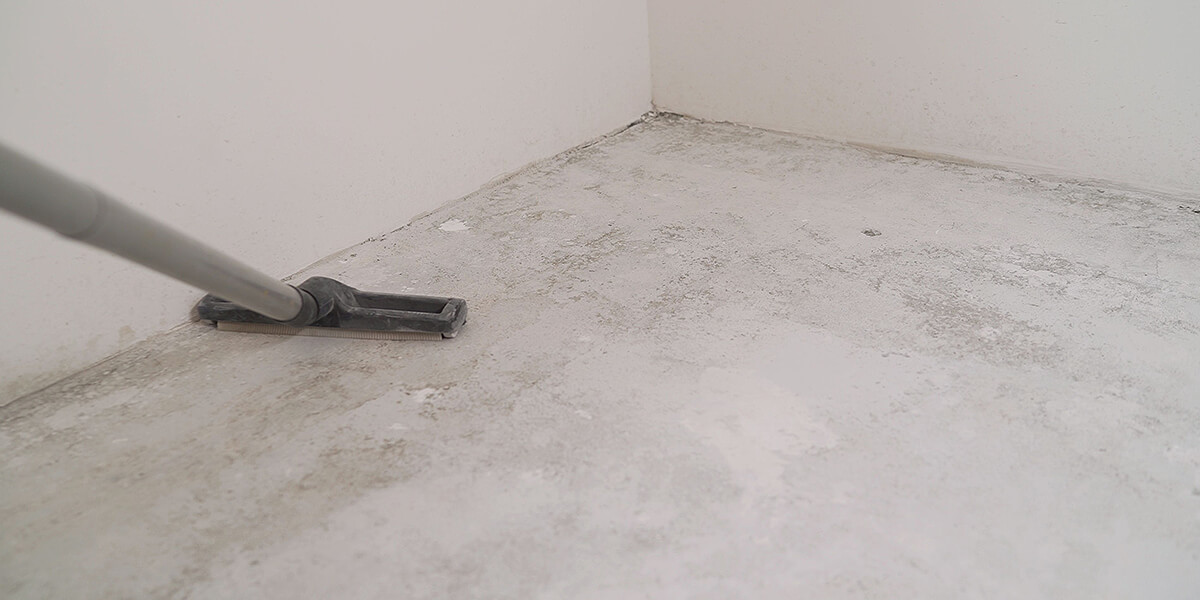
If you aren't tasked with repairs, simply clean your subfloor with a good sweep or thorough vacuum to remove the dirt and dust. If there's still adhesive left from the previous flooring, either scrape it off or sand it.
Checking for Moisture
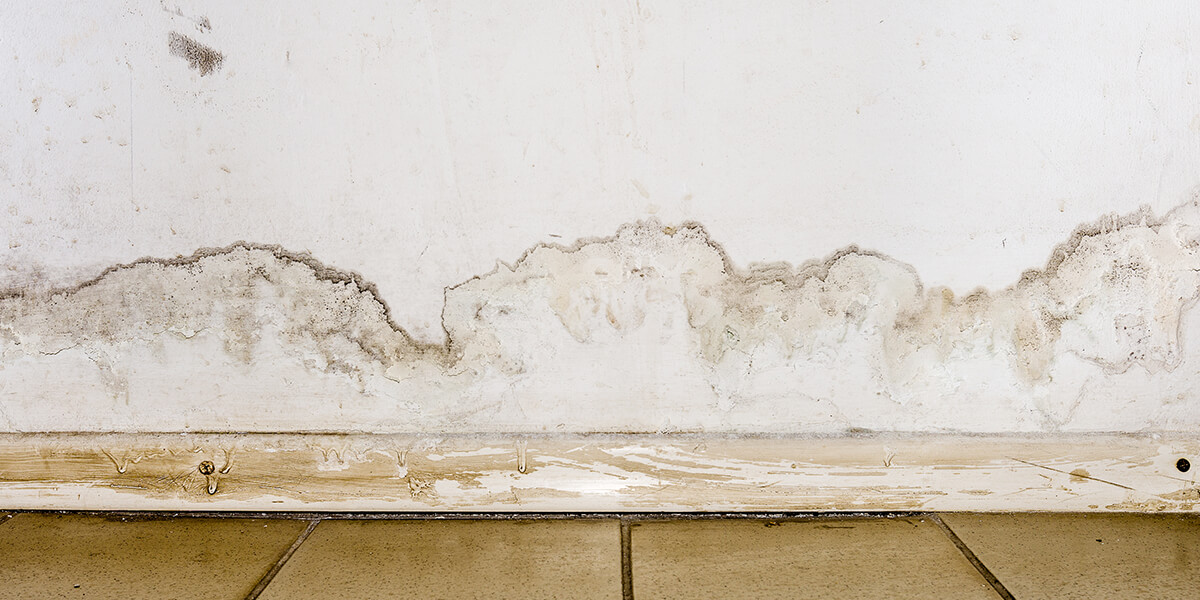
You'll also need to deal with excess moisture if your subfloor shows signs of it, since this will damage the laminate.
The first step is to look for any visible water stains. These could indicate an ongoing moisture problem, which you'll need to deal with before anything else. But if everything looks okay, the next step is to check the degree of the subfloor's moisture.
This is relatively easy to do with a testing kit you can buy online; in which case the moisture content will need to be below 12%. You can also use a hygrometer, and here you're looking for a relative humidity of between 46% and 65%.
If your moisture proportions are not ideal, you could apply a subfloor primer. This will waterproof a concrete subfloor.
Installing a vapour barrier is another option, and this is sometimes referred to as a damp-proof membrane (DPM). This DPM stops moisture from rising into your laminate flooring from your subfloor.
And finally, you could simply use underlay with built-in DPM, which is the recommended choice.
Conditioning the Laminate Flooring
As with any other type of wooden floor, laminate requires some time to adjust to its surroundings. It's likely that any packs you've purchased have been stored in a cold depository and then spent some time in the back of a delivery vehicle. The varying moisture levels and different temperatures it's already subjected to make it important to let it adjust to the area it's destined for.
All you need to do is stack your flooring in unopened boxes in the room they're going to be fitted in for 48 hours. This is more than enough time for them to integrate into their new home.
Laminate flooring contracts and expands, so it's susceptible to different humidity and temperature levels, and you risk it changing size if you install it immediately. This means cracks appearing or buckling, and you would then have to deal with gaps suddenly appearing between boards that were installed snugly alongside one another.
6. Fitting the Underlay
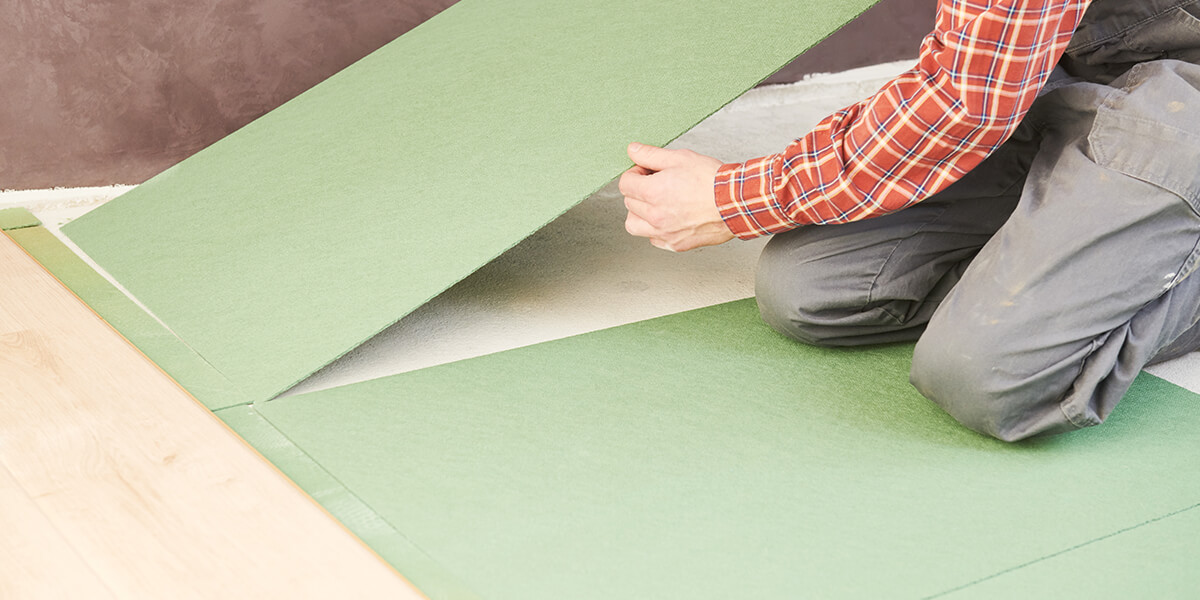
Although many people see it as an optional extra, there are so many benefits to using underlay when you install laminate flooring that we view it as a Must-Do.
- Underlay means you'll have additional comfort underfoot. Because your new flooring hasn't been put directly onto an unyielding subfloor, you get a little extra bounce when you take a step. This is thanks to the soft cushioning layer you've added.
- Adding underlay increases the lifespan of your project thanks to the extra protection it affords.
- Underlay adds to the sound-dampening possibilities of your new flooring. The extra layer minimises noise and is especially important for your upstairs areas.
- Your underlay will behave like an insulator as well. This means your home will be that much warmer and you may find your heating bill decreasing.
There are various types of underlay suitable for use with laminate flooring, and the option with built-in DPM will keep it safe from moisture damage from a concrete subfloor. If you've got underfloor heating, however, you'll need to use underlay suited to this purpose.
Fibreboard is a good option because it provides excellent heat installation and also covers minor indentations and protrusions in your subfloor. So, take this route if your subfloor isn't totally level because you'll be able to enjoy a perfectly flat surface even if you've got protrusions of as much as 3 mm.
7. Hints and Suggestions
Ensuring you do a good job is simply a matter of taking the proper amount of time and care from the very beginning.
Here's what we've learned from the kind of trial and error you can avoid.
- Your laminate's thickness could prevent you from opening and closing the door to your room properly. It's crucial that you test this beforehand! If this is the case, you will need to remove the door and plane it along the bottom so that you have the room you need for your new flooring.
- Lave a gap of between 10 mm and 15 mm between laminate planks and the wall when you're fitting your flooring. This will see its contractions and expansions accounted for, and now, if your floor increases in size, there won't be the issue of the joins being too pressured. If you neglect to do this, you may soon be dealing with buckling or cracking. Laminate floor edging will help you hide this gap.
- Staggering plank joins running side-by-side are always a good idea. If they're fitted too close they could make the room look a little crowded. Aim for around 300 mm between them.
- Make sure that your final row of planks is at least 60 mm wide. If you go any thinner than this, the floor will look uneven. Take a measurement of the room you're laying the floor in and work out how wide your last row is going to be, taking the expansion gap into account. If the total is less than 60 mm, simply cut your first row. This will allow for the extra space you need in the last one.
- Laying your laminate flooring horizontally or vertically is up to you, but it's important to know something about these two approaches.
Vertical positioning will elongate your space and is perfect for pointing towards a window because it'll follow natural light. Laying your flooring horizontally, however, is great if you want a small room to look a bit bigger.
Many people prefer laying their boards in alignment with the longest wall of the room.
If you are installing laminate flooring over a wooden subfloor, install it at an angle of 90° to the existing wooden boards, which will give you a little extra stability.
- It can be helpful to do a practice run of laying your floor since this will ensure that you're happy with the joins spacing and the final result. It is also a good idea if you're unsure of which direction to lay your boards in and will help you get an accurate idea of how much cutting is going to be necessary.
- When you're putting your underlay down, do it in the same direction you're going to be placing your laminate in. And don't forget to leave a proper gap around the edges of any radiator pipes in the room.
- A string line is the only way to ensure your flooring rows are running straight. Making one is easy:
- Measure the width of your plank and add the expansion gap.
- Calculate this distance from your wall and softly hammer a nail here to mark the spot.
- Repeat this process on the other end of the room and then string a line between these two points, tying a knot around the nails.
Line up your first row of flooring planks here, and you'll be able to guarantee they're 100%
straight.
- Start the installation from the longest wall's upper left-hand corner and fit each plank from left to right. And if you need extra guidance, take advantage of the YouTube tutorials available online.
8. Fitting Laminate Flooring
And now, we get to the job at hand, with all the planning and preparation completed and your workspace ready for your project to begin.
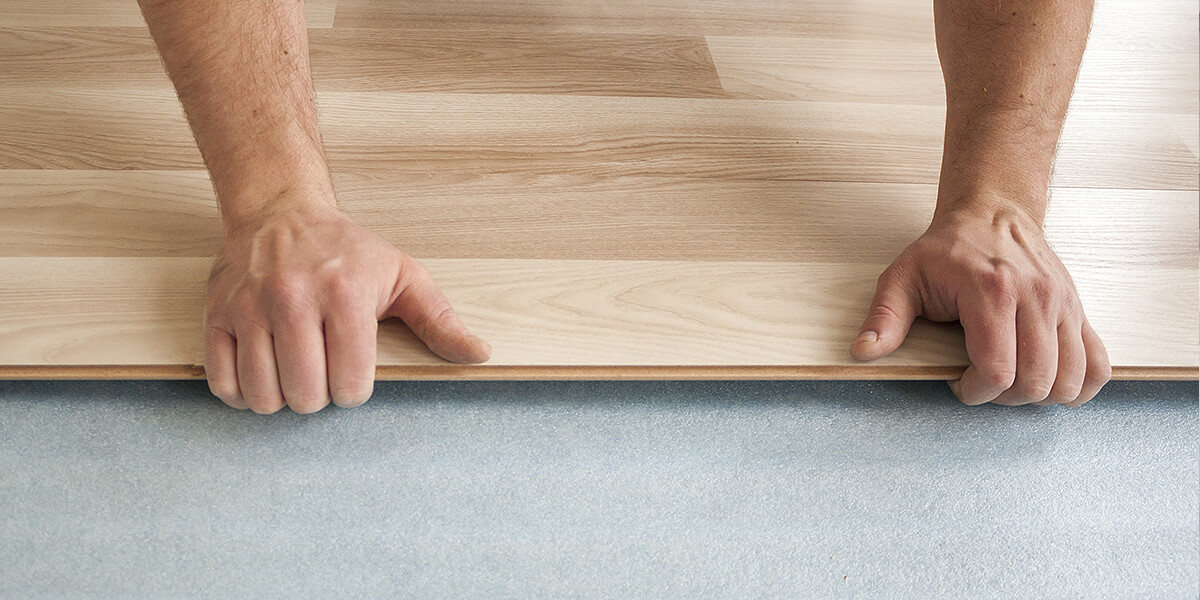
This process is called a Floating Installation, which means that nothing gets glued to your subfloor. This makes it nicer to walk on and will make replacing damaged planks a lot easier if you need to.
- 1. If you're using underlay, you will need to lay it across your subfloor, covering the whole area and joining it with tape.
- 2. Lay your first plank in the top left corner of the room so that the tongue side faces the wall. This is the edge where the board overhangs and lets the next row easily slot into place. Once you've done this, move it a little way from the wall, using your flooring spacers to create the necessary expansion gap.
- 2. Take your second plank for this row and line it up with the first one. If you are using laminate with a click-lock system, you'll simply slot the second one in to place it properly. Don't forget to keep your expansion gap constant along the wall by using your flooring spacers.
- 4. Keep going this way until there is no space left for more planks. Double-check that the row is 100% straight using your string line. For your last board, lay the final one on your first row and up against the spacer on the end wall. Then, use your pencil and ruler to note the cutting line.
- 5. Clamp the plank on your workbench then use your jigsaw to cut along the line you made. Your board should now simply slot into place at the end of your first row.
- 6. Use the previous plank's offcut to start the next row. If it is less than 300 mm long, cut one of your full-size boards in half instead and use this to start the second row.
- 7. Using your spacer again between the wall and the laminate, lift the plank at an angle and press it against the first row. Now, gently rotate it back down so that the rows are secured together.
- 8. Push any planks that aren't in perfect alignment together with your tapping block.
- 9. When you lay the next board, lift it at an angle once more, lining up the shorter side with the plank you've just installed. Lower it very gently, and these two short sides should click together.
- 10. Keep on with this process, cutting up boards as you need to maintain the space between the joins.
- 11. When you get to the last row, use your pull bar and hammer to lightly join it with the one before and ensure a tight fit.
9. Tackling Tricky Areas
One of the biggest challenges when installing laminate flooring yourself is manoeuvring around the little obstacles found in most rooms. Corners, door frames and radiator pipes all require a little extra work during the fitting process.
Fitting Laminate Around Corners
This is actually quite a simple job; you will just need to do a little cutting to make sure you get a clean fit.
Place a laminate plank against the corner and add the expansion gap where the board meets the wall, marking it with your pencil. Now you've got the width of the cut. Now, place the board against the side of the wall, noting the length. Use your set square to clearly mark out the part that needs cutting away.
Now clamp the plank to your workbench and create the shape you need with your jigsaw. That's it! Now, just fit the board and ensure it’s snug.
Getting Door Frames Done

There are two approaches to this issue. The first is undercutting your door frame to
make space for your laminate flooring, and it's the easiest.
Put a piece of laminate and your underlay against your door and pencil the width of the latter at the line they reach. Use a handsaw to cut your door frame along this pencil line, and tap the wood with a chisel and hammer to create the gap you need. Don't install the laminate and flooring just yet, however. Do another check, make sure that the space is adequate, and then finish the job.
The second approach is the more technical one and necessitates more intricate cutting of your laminate board to make it fit your door frame. It's time-consuming and difficult, and you'll also need to purchase sealant to hide ugly gaps. It's the type of installation process that's better left to the professionals, so we recommend you follow the first option.
Radiator Pipes
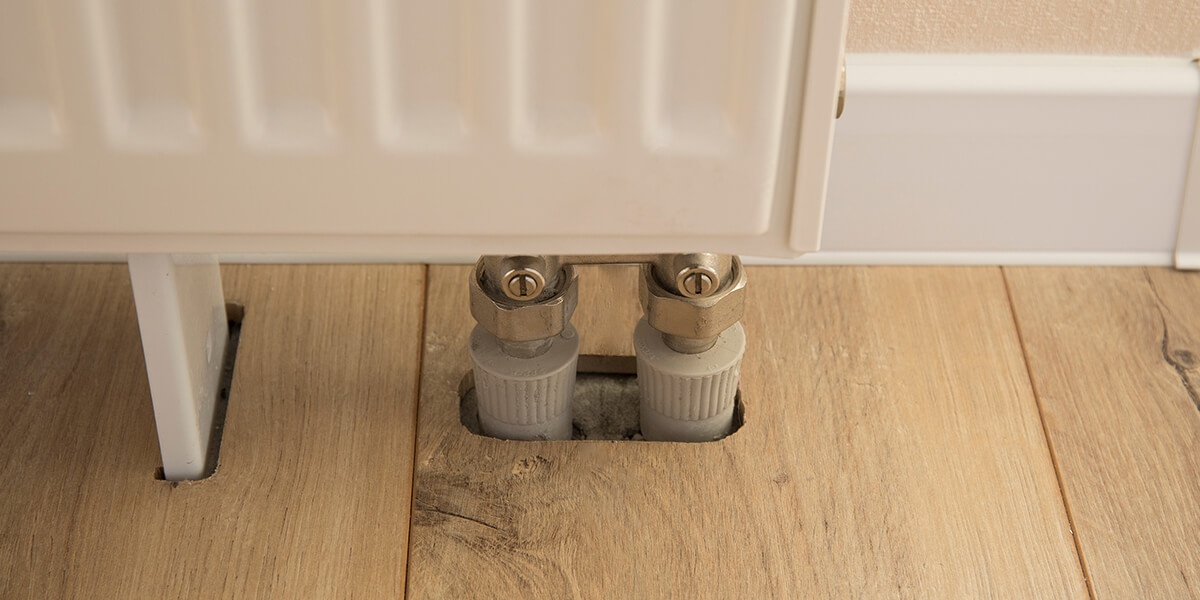
This process is very simple:
- 1. Lay your laminate plank alongside the radiator pipe with the short side against the wall.
- 2. Use your pencil and ruler to draw a line along with the board's width corresponding to the middle of the pipe.
- 3. Move the board so that its short side is now against the pipe.
- 4. Draw a line down the plank's length, pursuant to the centre of the pipe, so that it intersects with the mark you've indicated. Now you've got the radiator pipe's centre point on your board.
- 5. Clamp your laminate to your workbench and get a drill bit big enough to allow for the width of your radiator. Drill a hole over the point where the lines intersect, making room for your pipe to fit.
- 6. Draw two straight pencil lines from the hole to the plank's short side.
- 7. Use your jigsaw to cut along these and save the offcut.
- 8. Slide the board into place so that the radiator's pipe fits into the hole you've made, and grab your wood offcuts. Glue these back into place, and you're done!
Stairs
When you're fitting laminate around the bottom of your staircase, use the same technique you used for the door frames. Undercut the bottom of your stairs the same way so that you don't need to make complicated cuts on your planks.
Doing this guarantees a neat and tidy end result.
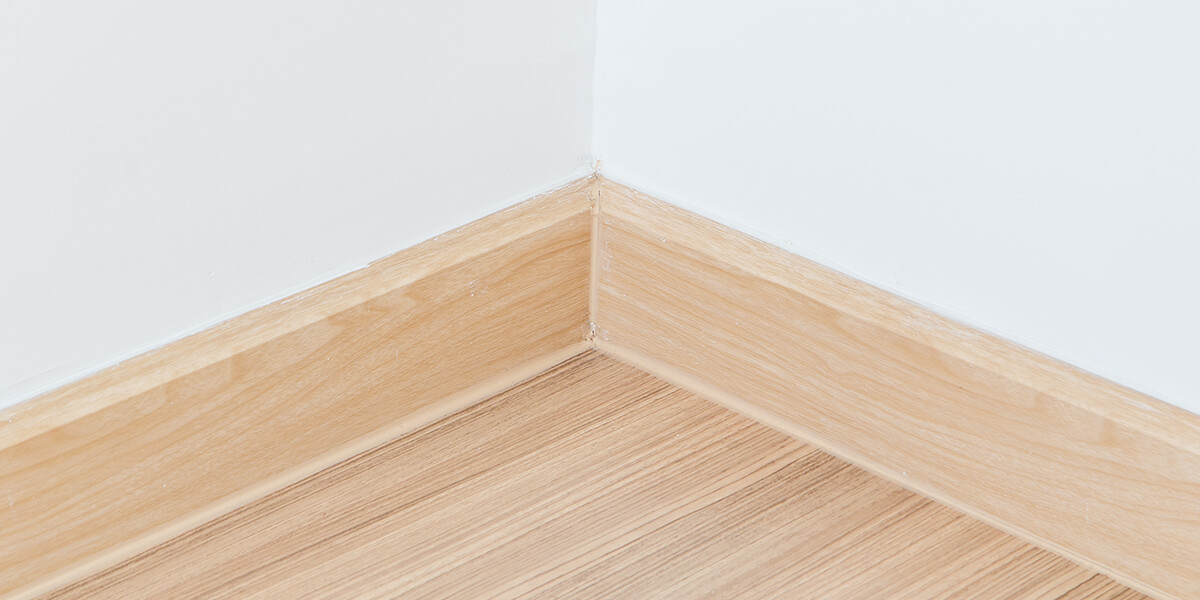
10. Fitting Laminate Edging
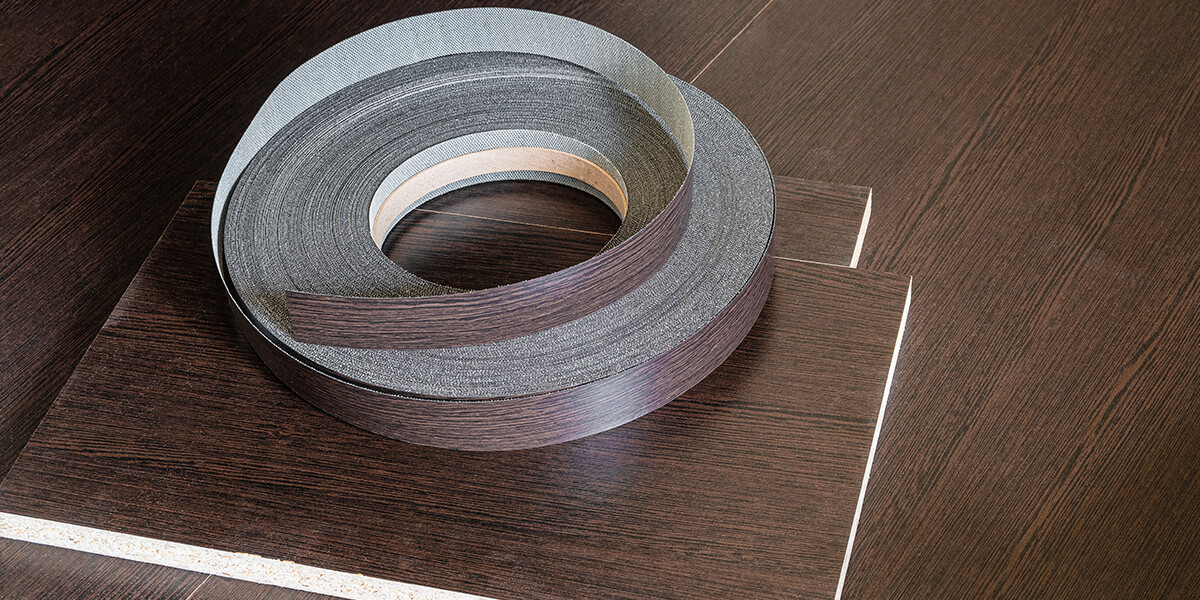
As necessary as expansion gaps are, they don't look great, and that's where edging, sometimes referred to as beading or scotia, comes in. It's to hide the unsightly gap between your new laminate flooring and skirting boards or walls.
Edging creates the perfect finish and can be colour-matched to your flooring. If you can't exactly duplicate the hue or find one you like, going with white is always an option. Sometimes, you'll be able to get free samples when you order your planks, so be sure to check.
Cut a 45° angle on the beading using your mitre box and one of the saws. Do the same on a second piece and then glue these together to make a corner. To install it, put a thin layer of adhesive on the back and then attach it to the wall, using panel pins to hold it in place. Remove these later if you want to, or keep them as you like.
Repeat this process to fit the rest of your edging, making cuts where necessary and aiming for a snug fit.
11. Fitting Radiator Rings
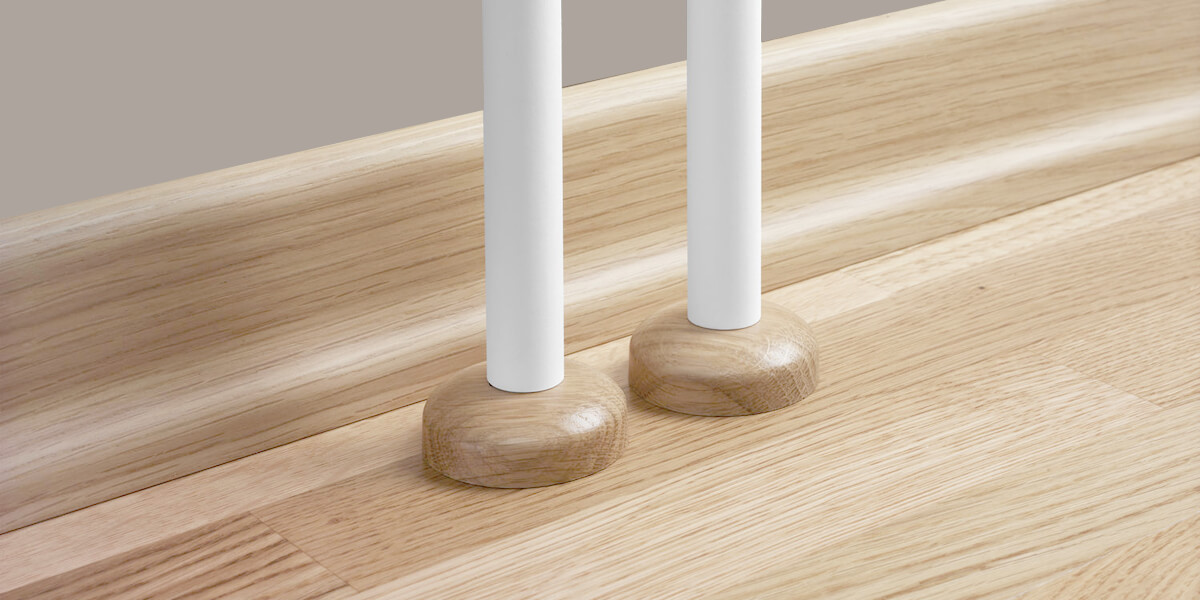
These simple finishes can make a world of difference to what your new room ends up looking like. The real wooden radiator rings come in two parts, and you'll just need to fit them around your radiator pipes and click them into place.
Other radiator rings arrive in one piece. With these, the small gap in the ring allows you to fit them around the pipe to finish the look.
12. Dealing With Door Thresholds
You can choose from a range of door thresholds when you're installing your laminate flooring. Often referred to as Profiles, they hide the join between two rooms.
Which ones you'll use depends on what floor coverings you've got and the heights of these.
- End Profiles are used between flooring and walls.
- Ramp Profiles are used between floors of different heights.
- T-Profiles are used between floors of the same height.
- Multi-Use Profiles are used with floors that are identical in height or which differ.
You may need to cut your threshold to size, depending on what width your doorway is. You may also have to glue your threshold into place to make it fit properly.
13. Aftercare and Upkeep
As is the case with most things, your new laminate flooring will require the proper levels of care and maintenance if you want to extend its lifespan.
Prevention Is Better Than Cure
You'll want your new flooring to remain in a pristine condition for as long as possible and the best way to guarantee this is to minimise even the chance of damage.
- Put felt pads on the bottom of the furniture legs. This means no avoidable dents and scratches.
- For heavier furniture, consider protective mats, especially if they get moved often or will be soon.
- Put mats at all the doors leading outside. They'll add to the style of the room and helpfully collect dirt, grit, and other unwanted material that would otherwise end up on your floor.
- Put rubber underlays on the backs of all your rugs so they don't move around as much.
- Make sure you keep your pets' nails trimmed so they don't scratch your fancy new floor.
- Clean spills at once so that you don't run the risk of water damage.
A Clean Slate
As easy as laminate floors are to clean, there are some methods that you should avoid. Here's a handy checklist of some Dos and Don'ts.
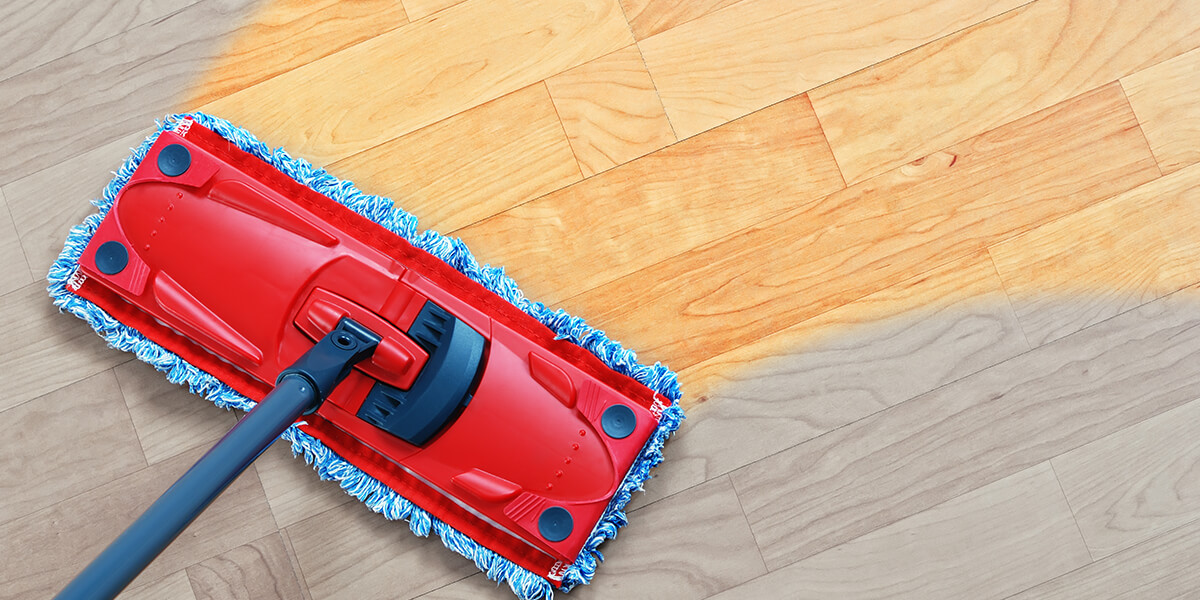
Do:
- Sweep or vacuum often. This prevents dirt from building up, even if it's not immediately visible.
- Use a soft-bristled broom and brush so you don't scratch the surface.
- Don't drench your mop before a clean. Use a slightly damp one instead, and only once you've removed all the surface grime.
- Remember that warm water is a good way to remove more stubborn dross.
- Stick with commercial products. If you're using a floor cleaner, stick to ones that have been approved for use with laminate floors.
Don't:
- Use vacuum cleaners with beat bar attachments. Remove these before you use it.
- Use steam cleaners. Their high moisture levels will cause horrible damage.
- Use harsh detergents like bleach. You could permanently tarnish your laminate's design layer.
- Use abrasive cleaning tools like steel wool.
- Experiment with home remedies for your cleaning products.
- Make the floor too wet. Use your cleaner as sparingly as you can.
- Polish or wax. The top layer of your laminate floor is literally a printed image, and buffing it may damage it.
14. The Benefits of Laminate Flooring
Laminate flooring is quite possibly the very best bang you're going for your buck as far as decorating goes. And it has additional benefits beyond this. Not to mention the real pride you'll be able to take in living with a gorgeous new space you've created with your own two hands.
It's Easy on Your Wallet

Not only is laminate flooring a lot cheaper than hard surfaces to begin with, but you can also save a lot of money by installaing it yourself. And then it puts money back in your pocket thanks to how durable and long-lasting it is going forward, too.
There's no getting around the fact that home renovations of any kind cost money. This is why most of us want the best possible end result with the lowest possible cost. But no one wants to compromise on aesthetic appeal, functionality, practicality, sustainability or quality.
Laminate is by far the best option, especially if you want to mimic the luxury of genuine hardwood floors without having to wipe out your savings to do so.
The Choice is Yours
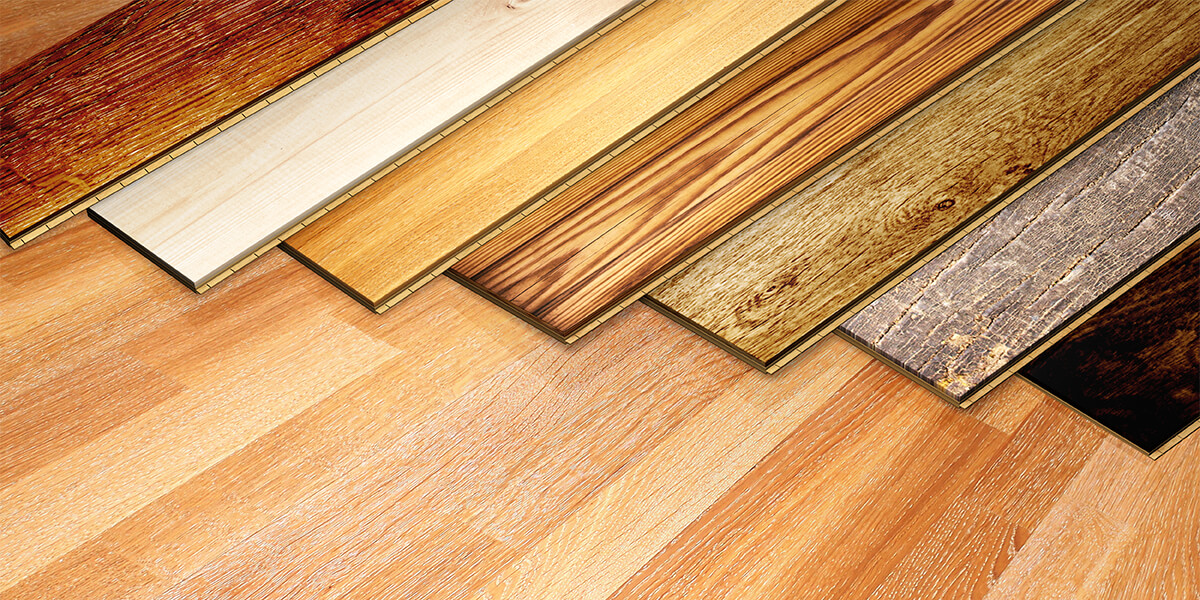
Laminate flooring is available in a wide variety of different styles. There are many that authentically simulate the hardware of wood and stone floors, but there are also a lot that allow for something different. The possibilities in terms of colour and style are almost endless.
A variety of different colour tones and divergent patterns let you match your floor with the exact mood and feel you want for your room. Whether you want cool, contemporary notes or something elegant and rich, you'll be able to find the perfect flooring. Let your imagination run wild and create your perfect living or working environment easily.
Laminates offer a huge range of hue and design and you won't have to compromise on quality to be able to afford what you want.
Cleaning and Maintaining it Is Easy
The fact that it's difficult to stain laminate and it has a moisture-resistant surface coating means spills and other messes are simple to deal with. It also doesn't need varnishing or waxing to look amazing.
It's Environmentally Friendly
Because your laminate floor won't be using any natural resources, you will be able to lower your environmental footprint quite seriously. No hardwood trees are harmed when luxury laminate flooring is being manufactured, and this is an even bigger factor if you're aiming for a green profile for an office space.
Laminate flooring is a composite material made of sawdust, wood chips, and other post-consumer wood items. The image applied to this composite is what gives the floor the appearance of traditional wood, with a natural grain lending elegance to whatever room you have installed it in. There's no reason to harvest any kind of raw material to create a laminate plank. So, not only are no natural resources being depleted to make your home or office more lovely, there is no shipping involved either.
And, when you're ready to remodel or replace your old laminate floor with a new one, the eco-friendliness continues apace. The Floating Floor process we used is easy to remove without damaging the boards, so they can be used to breathe new life into another space.
The flooring can also be recycled, ground up, composted, or even burned as an alternative energy source. The fact that there are no synthetic chemicals used in the process means it's safe for the environment too.
It's Extremely Durable
Laminate flooring is protected by a tough outer layer and resin coating. This means it is a lot stronger than carpeted, hardwood, or vinyl floors along with being more resistant to scratches and impact. You've finally found an opponent worthy of the fluffiest dog, furriest cat, dirtiest kid, or highest heel!
It Offers a Healthier Environment
When you are living or working in a space that has laminate flooring, there are no spaces where debris can get trapped. This is wonderful news for those of us who are allergic to dust and mites.
The Warranty is Your Guarantee
Not only will your new flooring resist fade, moisture, and stains, most laminate manufacturers additionally provide extensive warranty protection against these factors too. The minimum will give you a year of protection, but longer coverage is possible. You could cover it for its lifespan if you wanted to.
Laying your own laminate flooring is easy, cost-effective and results in a wonderful finish in any room. With this guide, you can confidently give your home or office a makeover that lasts.
Related Articles

Category
Doors & WindowsPosted On
31st December 2024

