Whether you are attaching structures securely to a wall or simply hanging a delicate family portrait in your living room, you need to ensure that you are doing the job properly. Despite what many may be inclined to believe, not all walls are the same. Hence, not all wall anchors will be appropriate for all contexts.
In order to preserve the structural integrity and aesthetic value of your interior walls, it's important that your first attempt at installing drywall anchors is successful.
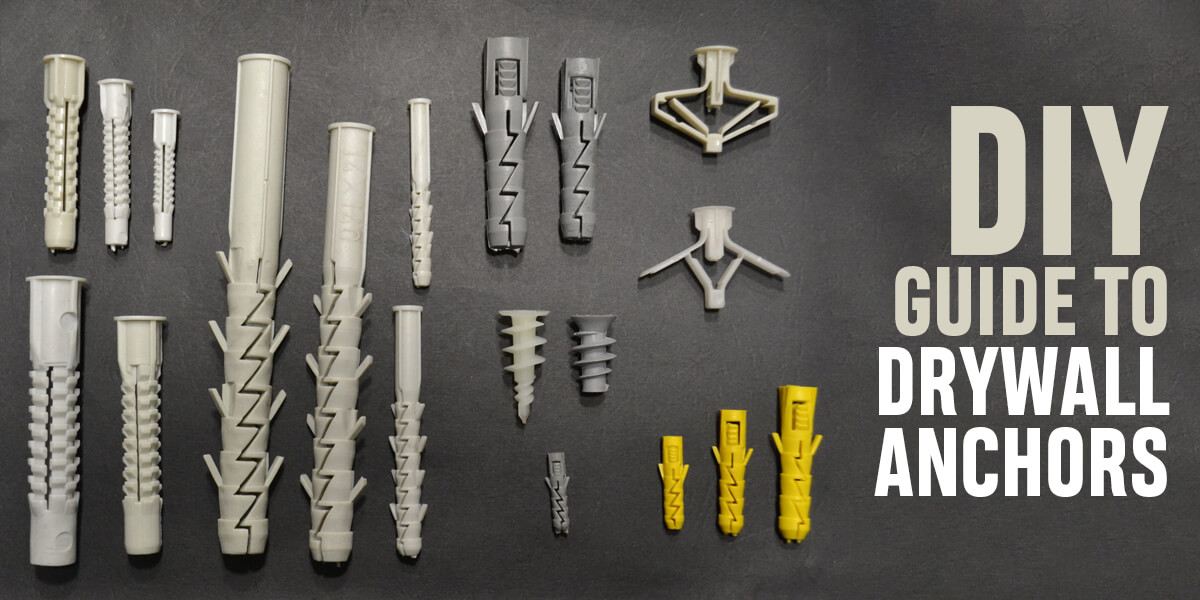
We're here to provide valuable insights into the workings of drywall anchors by walking you through the different varieties, such as screw-in anchors, threaded anchors, self-drilling anchors, and hollow wall anchors.
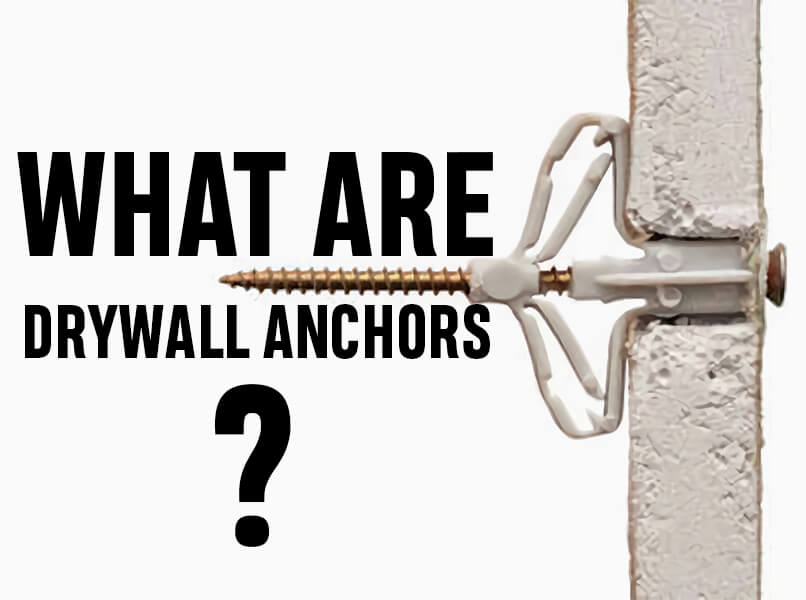
What are Drywall Anchors?
If you are to understand what drywall anchors are, you must first understand what exactly is meant by the term 'drywall'. This type of wall, also known as a wallboard, is exclusively used for the construction of interior walls and ceilings.
The panel is made of a sheet of gypsum plaster which is then positioned between two thick sheets of either backer or facer paper.
Drywall is typically used to conceal steel structures and envelope columns whilst also being surprisingly effective in slowing the spread of fire. Should a fire break out inside a building, drywall would help to minimize its spread, thus allowing people more time to safely evacuate the premises.
Now that the structure of the drywall has been established, we can move on to the drywall anchor. They are designed to secure mirrors, images, clocks, and other ornamental features on interior walls. Common nails and screws do not work on drywalls as they tend to just unscrew themselves without the double enforcement of an anchor structure.
Drywall anchors come in a range of shapes and sizes. You might have heard of the term 'expansion anchor'. This is a drywall anchor. This nickname has been derived from the anchor's mechanism. As the screw is driven further into the wall, it expands to push against the walls of the hole that you are creating, and, in this way, it establishes a steady grip.
Threaded Anchors

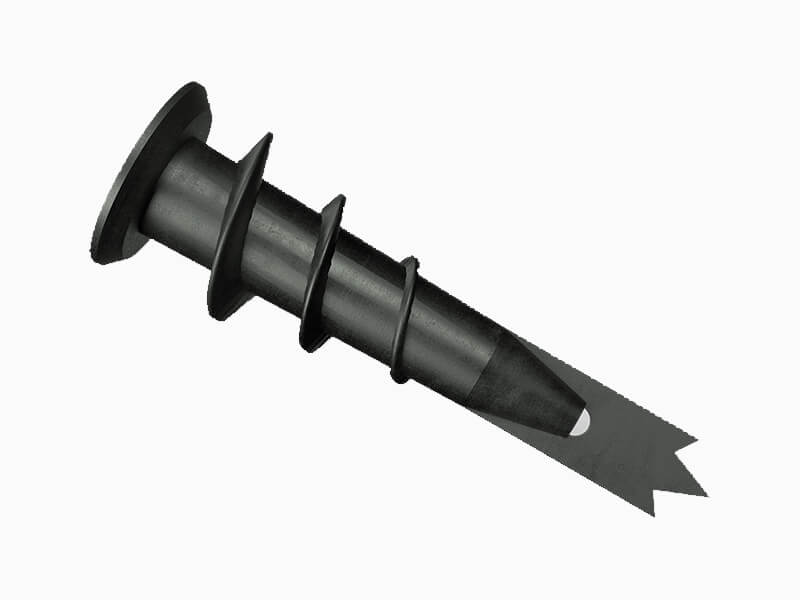
These types of drywall anchors are suitable for hanging slightly heavier objects. Threaded anchors are typically made of metal or hard nylon and are sometimes referred to as 'self-tapping' or 'self-threading' anchors.
The sharp shanks of this anchor do not require a pre-drilled hole. As one of many screw-in anchors, you only need a simple screwdriver to effortlessly insert it into drywall. Once the anchor is in, the screw is inserted. As this happens, the sides of the anchor are encouraged to flare out and in doing so, it becomes securely wedged within the drywall. It should be noted that threaded anchors cannot be used to attach objects to interior ceilings. They only work for walls.
Depending on the size of threaded anchors, they can typically support a weight of between 25 and 75 pounds. Although prices will range according to store, brand, and size, they usually cost between $0.25 and $0.40 per anchor.
Self-Drilling Anchors
Self-drilling anchors are a particular type of rod anchor. They are composed of multiple parts which include a sacrificial drill bit, a hollow steel bar of varying internal and external diameters as well as coupling nuts.
The body of the anchor consists of a steel tube with an outer circular thread. At one end of the tube is the sacrificial drill bit and the associated nut with a plated steel end. The sacrificial drill bit is an alternative to the classic drill bit, and this is what makes self-drilling anchors so unique.
These anchors are appreciated for their increased capacity for stability and resistance to undesirable flexibility despite being comprised of the usual quantity of steel. The hollow steel bar is inserted into the wall by means of rotary percussive drilling. A fluid called the 'injection mixture' moves through the holes of the sacrificial drill bit, and this movement ceases once the mixture leaves the drilled hole.
Molly Bolts
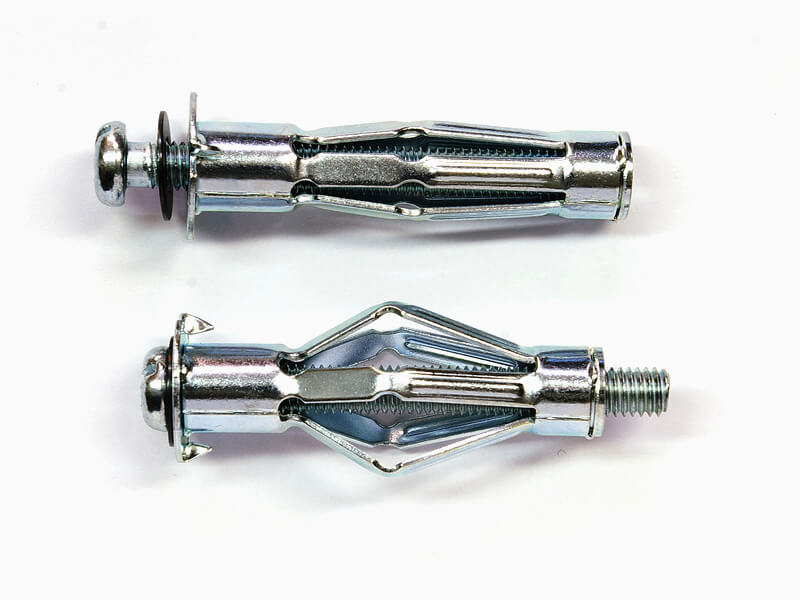
A molly bolt, oftentimes simply called a 'molly,' is a type of screw fastener. This type of bolt is typically used to attach objects to a board made of either gypsum or plaster. As is typical of a drywall anchor, this molly bolt stays secure by virtue of the tension exerted by the anchor arms against the walls of the hole into which it has been inserted.
The more the bolt is fastened, the more the arms of the anchor will pull forward to settle into a highly secure position that is perpendicular to the placement of the bolt. Molly bolts are ideal for securing moderately weighted objects. Depending on its size, a molly bolt should be able to support an object that ranges between 25 and 50 pounds in weight.
People will often opt for a molly bolt if they want to secure an object to the ceiling. As has been mentioned, they are best suited to moderately weighted objects and would, therefore, be perfect anchors for smoke alarms, picture frames, and medium-sized mirrors.
Toggle Bolt or Toggle Anchors
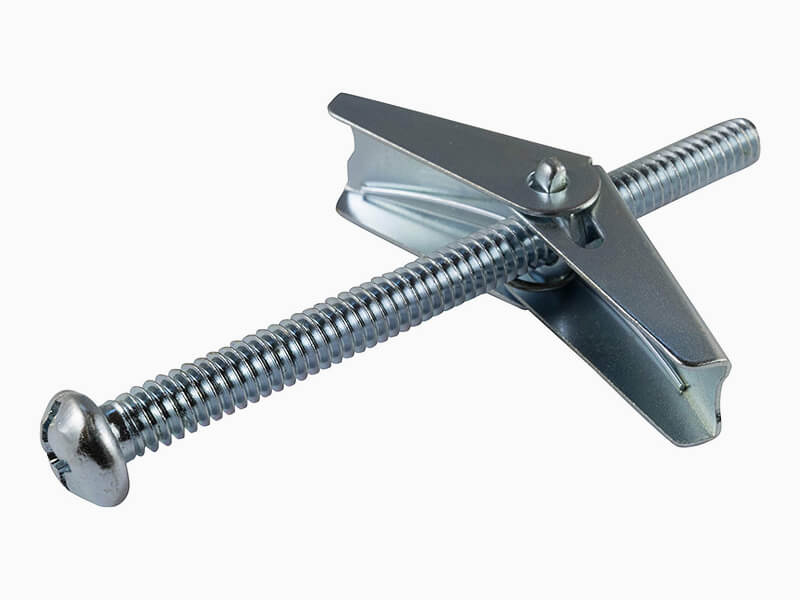
Toggle bolts, also known as toggle anchors, are perfectly efficient for supporting lighter objects. As you get both metal and plastic toggle anchors, the weight that they are able to bear will range rather drastically.
Since drywall is more inclined to break when burdened with excess weight, toggle bolts should be used with extreme caution when attached to a ceiling. As a point of comparison, they can support 50 pounds when attached to a wooden ceiling.
A traditional metal toggle bolt, while being the strongest toggle bolt available, is rather tricky to install. It requires that you first drill a hole into the wall. The hard part is drilling the right size hole, which should be three times wider than the diameter of the bolt that you are inserting. This is to accommodate the necessary expansion of the anchor.
Once it has been inserted, you need to quickly twist the bolt in order to loosen the wings that were previously folded flat against the bolt. Once this is done, you need to ensure that the bolt remains straight as you tighten it with a screwdriver. This process allows the anchor to secure a sturdy perpendicular position along the back of the drywall.
Hollow-Wall Anchors
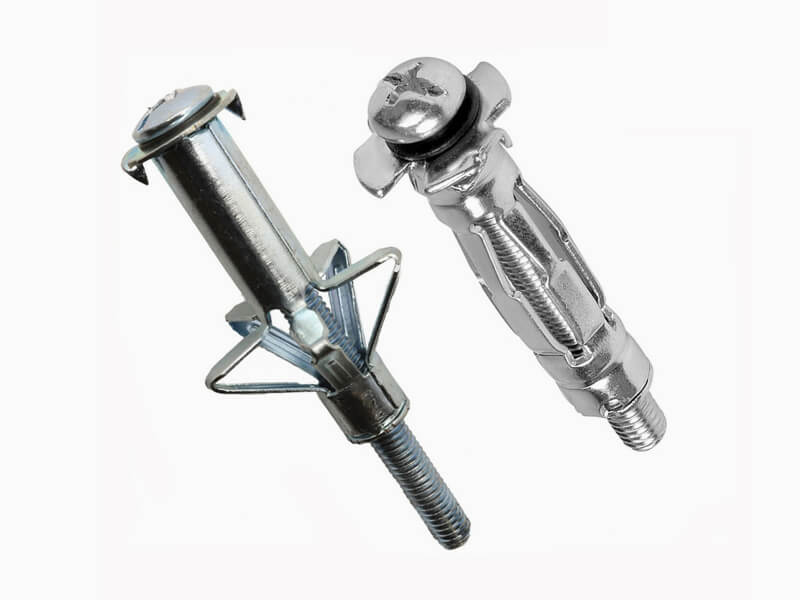
As the name might suggest, hollow wall anchors, are specifically designed to secure objects to walls that have hollow cavities. What makes this anchor particularly useful is the fact that the body of the anchor will remain steadily placed within the wall even if the screw component is removed. This means that hollow wall anchors are ideal for securing things that need to be moved from time to time.
In typical drywall anchor style, the flaps open in an umbrella-like motion as you twist the screw into the wall. There are four of these flaps, and each one is slightly dented in the centre.
This type of anchor can also be effortlessly installed using a hollow wall anchor gun. If this is your chosen approach then all you need to do is place the anchor into the pre-drilled hole and hook the head of it to the gun. The gun will pull the bolt, which, in turn, allows the anchor to move into its most secure position.
The most common uses of hollow wall anchors are electrical sockets, electrical fittings, lightweight brackets, and hooks. For this reason and many others, this form of drywall anchor is a popular favourite amongst electricians, construction workers, and plumbers.
How to Install Drywall Anchors
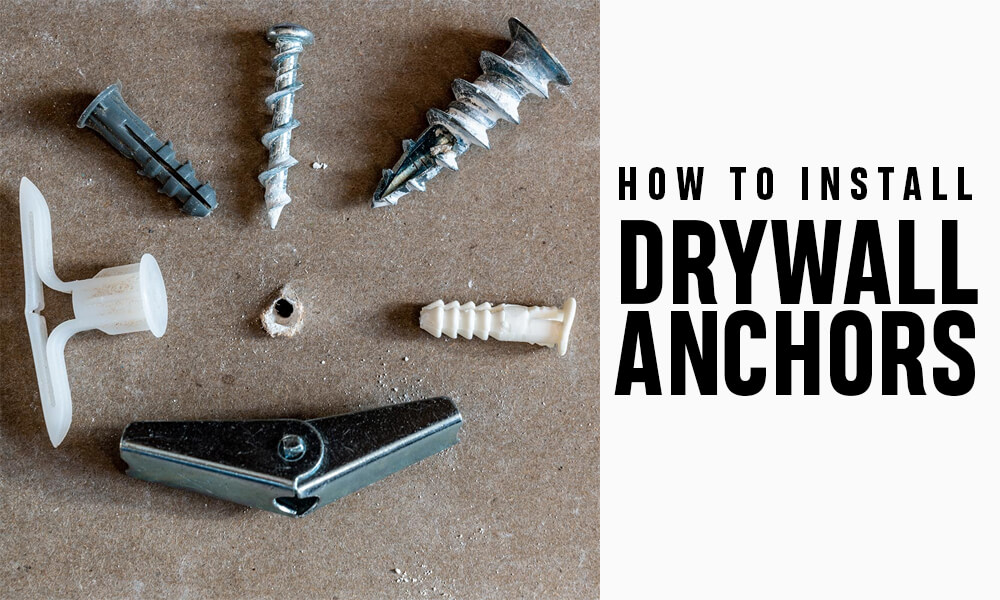
- Tools Required The type of anchor you are using will be informed by the shape, size, and weight of the object which you are attaching to the ceiling or wall. The last factor mentioned is, intuitively, the most important to consider when purchasing a drywall anchor.
That being said, drywall is famously not the strongest of interior structures, so hopefully you will not be attaching anything that is particularly heavy. When it comes to installing a drywall anchor, you should not need any tools other than a hammer, a screwdriver, a power drill, and a full drill bit set as well as the drywall anchors you want to install. - Materials Required As has been mentioned, each type of drywall anchor is unique. The materials needed depend largely on whether or not a hole needs to be drilled prior to inserting the screw or whether you are able to twist it in using a screwdriver or your hand. Please refer to information regarding the specific types of anchors to determine which materials you need.
- Instructions There has already been mention of the ways in which to install specific drywall anchors such as threaded anchors and hollow wall anchors. There are, however, many other kinds of drywall anchors and knowing how to properly install them is useful. The first step to installing any drywall anchor is to lightly mark where you would like the anchor to be.
If you are working with self-drilling anchors, you need to gently hammer the first part of the screw into the wall on the marked spot. Do so until it can remain in the wall without your support. Using a screwdriver, lightly screw the rest into the wall until the head of the screw aligns with the drywall. The trick is to do this process slowly and carefully.
If you ever come across a snap toggle, you might be confused as to how you should appropriately install it. The joy of the snap toggle is that the bolt can be removed and reinstalled at your convenience.
When installing a snap toggle anchor, you first need to drill a hole that accurately matches the size of the anchor's screw. Secondly, you will slide the metal prong-like piece through this hole. Holding the straps, you are required to pull until the channel is completely embedded within the wall. Ratchet the cap until it is flush with the wall.
Once you have completed these steps you can wriggle the straps from side to side until they snap off at the point that is flush with the cap's flange. You may then insert the bolt and tighten it until it feels secure.
What to Consider When Using Drywall Anchors
When it comes to installing drywall fixtures it's important to be informed about all available options before making any rash decisions. There is nothing worse than leaving a permanent mark on your otherwise spotless wall because of simple carelessness. There are a few considerations that can circumvent any potential mishaps.
As we have mentioned, it is incredibly important to mark with a light pencil you want to install drywall anchors. This is particularly essential if you are installing more than one anchor for a single object. This easy step ensures that the ultimate degree of neatness and 'amateur professionalism' can be achieved.
Secondly, you should always check the structural integrity of your drywall installation. If drywall does not have adequate edge support or enough space between sheets, the stability of the wall is compromised. Furthermore, drywall that comprises a number of differently sized sheets held together by multiple bolts is inevitably unstable and unfit for the installation of anchors.
If you were to attach drywall anchors to a wall that has any of the three issues mentioned above, you could compromise the safety of the entire room. It is always worth consulting a professional if you are unsure. They will advise you on how much weight your drywall can tolerate as well as the ideal positioning of the specific objects that you want to secure.
At the end of the day, there is an abundance of excellent drywall anchors available for purchase today. With a little research, you will be the DIY king or queen of your household in no time at all.
Related Articles

Category
Doors & WindowsPosted On
23rd December 2024

