Buildworld: 0116 212 3456
Ultra TileFix ProFlex SP Rapid Set Flexible Tile Adhesive 20Kg
BW-27164 small Image 1
Ultra Tile Fix Logo

Ultra TileFix ProFlex SP Rapid Set Flexible Tile Adhesive 20Kg

SKU: BW-27164 MFC: PROSP20

Variations & Sizes

  1. Step 1
  2. Select Powder Colour
OP-11248 - Grey

Product Description

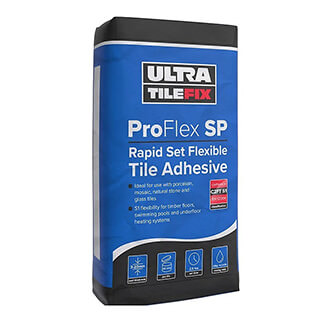
Ultra TileFix ProFlex Flexible Tile Adhesive is a single part, rapid setting, flexible adhesive for wall and floor tiles. It is specially formulated for greater adhesion and flexibility, making it ideal for areas with movement or vibration. Tiles made of porcelain, mosaic, natural stone and glass can benefit from the use of this adhesive. It has a pot life of 60 minutes and needs 2.5 hours to set.

  • UltraTileFix ProFlex SP is a single part, rapid setting, flexible adhesive for wall and floor tiles.
  • It is specially formulated with enhanced adhesion and flexibility, making it ideal for areas where slight movement or vibration can occur.
  • Classified as S1 in accordance with EN 12004 it has the high level of deformation for greater tolerance to movement.

Specification

  • Product Type
  • Rapid setting, flexible adhesive for wall and floor tiles
  • Ideal for
  • Use with porcelain, mosaic, natural stone and glass tiles
  • Suitable Tiles
  • Ceramic, Porcelain, Glass, Mosaics, Marble, Travertine, Granite, Limestone, Terracotta, Quarry, Slate, Quartz, Brick slips
  • Suitable surfaces & substrates
  • Concrete, Sand/cement screed, Plywood overlay 15mm min, Tile backer boards, Cement faced fibre boards, Anhydrite/calcium sulphate/gypsum based screeds, Tile on Tile, Firm and stable plaster, Plasterboard, Sand/cement render, Concrete brick/block, Hard vinyl tiles, Flooring grade asphalt
  • Unit Size
  • 20kg Bags
  • Colours
  • Grey & White
  • Classification
  • EN12004 Class C2FT S1
  • Bed Thickness
  • 3mm – 20mm
  • Grout After
  • 4 hours
  • Coverage
  • 4.5kg / m² at 3mm Bed Thickness
  • Pot Life
  • 60 Minutes at 20 degree C
  • Set Time
  • 2.5 Hours at 20 degree C
  • Application Temperatures
  • 5 degree C to 25 degree C
  • Storage
  • Must be stored in unopened bags, clear of the ground in dry conditions. Avoid frost
  • Shelf Life
  • 12 Months

+ Delivery & Returns

Ultra TileFix ProFlex SP Rapid Set Flexible Tile Adhesive 20Kg

£16.01Each
Ultra TileFix ProFlex SP Rapid Set Flexible Tile Adhesive 20Kg
  • Features
  • Ideal for use with porcelain, mosaic, natural stone and glass tiles
  • S1 flexibility for timber floors, swimming pools and underfloor heating systems
  • 3-20mm bed thickness
  • 60 minutes pot life
  • 2.5 hours set time
  • 20kg : 4.2 – 4.5L mixing ratio
  • Conforms to C2FT S1 EN 12004 and 12002 classification
  • Size: 20kg
  • Colours: White Grey
  • Lifetime guarantee
  • Key areas of use
  • General wall installations
  • General floor installations
  • Interior installations
  • Exterior installations
  • Wet rooms
  • Domestic showers with tray
  • Communal showers
  • Swimming pools
  • Electric matting underfloor heating
  • Piped water underfloor heating
  • Conservatories
  • Suitable tiles
  • Ceramic
  • Porcelain
  • Glass
  • Mosaics
  • Marble
  • Travertine
  • Granite
  • Limestone
  • Terracotta
  • Quarry
  • Slate
  • Quartz
  • Brick slips
  • Suitable surfaces substrates:
  • Concrete
  • Sand/cement screed
  • Plywood overlay (15mm min)
  • Tile backer boards
  • Cement faced fibre boards
  • Anhydrite/calcium sulphate/gypsum based screeds
  • Tile on Tile* (* Existing ceramic, porcelain and natural stone tiles (overlay) known as “Tile on Tile”)
  • Firm and stable plaster
  • Plasterboard
  • Sand/cement render
  • Concrete brick/block
  • Hard vinyl tiles
  • Flooring grade asphalt
  • Surface Preparation
  • All wall and floor substrates must be clean, dry, firm and stable, free of dust, dirt, oil and grease. Substrates should be strong enough to support the weight of the adhesive and tiles being fixed (see below for loadings).
  • For plasterboard and plaster finishes that have been painted and are showing a weak or flaky surface finish then mechanical sanders or hand sanding blocks are generally used to remove the film. However for the likes of floor screed surface contamination, adhesive residues and weak surface laitance or even smooth dense floors such as power floated concrete, these will require a more heavy duty scarifying using specialist flooring equipment to remove the surface of the substrate to ensure the substrate is sound,stable and has a rough open texture. To encourage best adhesion to the substrate it is advisable that prior to applying adhesive that substrates are primed (please see priming section below).
  • Remember - sanding or mechanical abrasion of any surface will leave powder deposits which require thorough removal by suitable vacuum equipment to provide a clean dust free surface. Failing to remove fine powder deposits and weak surfaces is a common reason for de-bonding of tile adhesive and primer from the substrate. Using a wet sponge to clean down a wall or floor of dust deposits only serves to spread it around, it is therefore advisable to vacuum thoroughly prior to use of wet sponge.
  • Tile on Tile: It is always preferable to remove existing tiles however fixing new to old is an accepted method as long as the existing tiles are sound, stable, dry, securely bonded and fixed to a background that is capable of taking the additional weight. Ceramic, porcelain and quarry tiles should be lightly abraded to form a mechanical key degreased and ensured thoroughly clean. For existing vinyl floor tiles only hard and “crunchy” vinyl tiles should be considered to be over-tiled. Be aware that some old tiles of this type contained asbestos so should not be abraded. Do not over-tile onto softer vinyl, quartz or composite tiles.
  • Calcium Sulphate Floor Screeds: It is essential that the floor is fully dry, if in doubt always check the moisture level of the floor is below 75%RH using a hair hygrometer before continuing. This type of floor can also suffer from surface laitance issues creating a weak surface layer and therefore they are highly likely to require specialist mechanical abrasion as indicated above.
  • Timber/Wooden Floors: All chipboard and T&G flooring should be overboarded using exterior or class 3 type plywood boards of minimum thickness 15mm or suitable cement backer boards. All over-boarding should be dry and conditioned to the environment in which they are to be used. Plywood overboards should have backs and edges sealed to prevent ingress of moisture and atmospheric humidity, as should the face to be tiled. A neat coat of UltraTileFix ProPrimer should be used to carry out the sealing process prior to installing the boards. The plywood boards should then be positioned,close butted and firmly screwed (not nailed) through the underlying flooring to joists ensuring a max distance between fixings of 300mm centres or less. If using cement backer board to over-board the timber/wood floor, then it should be of flooring grade and of suitable strength for the application to prevent deflection. It should be 9mm minimum thickness. The backer board should be bonded using a minimum classification of S1 type tile adhesive and the original wooden floor should be thoroughly cleaned and free of any surface coating or wood treatment. It should also be primed using a neat coat of UltraTileFix ProPrimer.
  • Underfloor Heating (UFH): If UFH is being installed it must be fully commissioned before starting the tiling process to ensure it is in full working
  • Underfloor Heating (UFH): If UFH is being installed it must be fully commissioned before starting the tiling process to ensure it is in full working order. This includes both electric mat and water pipe systems. Once the UFH has been commissioned it can be set to a low level to provide a max floor temperature of 15°C whilst the tiling and grouting processes are undertaken. It is critical that this temperature is not exceeded as this can force dry the adhesive and grout with the potential of causing cracks in the installation or tiles to de-bond. Maintain this temperature for a minimum period of 7 days while the installation cures and hardens. After this time the UFH can be brought up to the required room temperature slowly at a rate of 5°C per day.
  • Render: When tiling to new render it must be ensured that the render is a minimum of 4 weeks old and is thoroughly strong, dry, dust and efflorescence free and stable
  • Priming
  • UltraTileFix ProPrimer has been specifically developed to be used as a primer for use with cementitious tile adhesives to provide improved sealing and bonding properties for a variety of substrates.
  • Porous Substrates (includes: plaster, skimmed plasterboard, plasterboard, sand/cement, calcium sulphate screeds, cement backer boards, render and other open textured substrates) Prime with 2 coats of UltraTileFix ProPrimer. The first coat should be diluted 1 part primer to 3 parts clean water (by volume) and allowed to dry for a minimum period of 1 hour. When dry, apply a second coat diluted 1:1 (by volume) and leave for 1 hour to dry before continuing the tiling process.
  • Non-porous Low Porous Substrates (includes: cured epoxy DPMs, tile on tile applications, foil faced insulation boards, plywood floor overboarding) We recommend UltraTileFix ProPrimer in a single, neat application.
  • Mixing
  • Once the substrate has been prepared, continue with the tiling installation. UltraTileFix ProFlex SP should be added slowly to clean water in a suitable clean mixing tub and mixed thoroughly using a drill/mixer and paddle to give a slump free, easily worked mortar consistency. Once mixed the mortar is immediately ready for use and has a pot life of approximately 60 minutes at 20 degree C. Mix only sufficient material to be used within the pot life of the product. Do not remix or rewet/dilute product which has aged and is starting to thicken or set.
  • Mixing Ratio: 20kg unit requires 4.2L - 4.5L of water.
  • Application
  • Apply the adhesive to the required thickness (limits 3mm – 20mm) in areas up to 1m² at a time. For internal walls use a notched trowel to the following notch dimensions to provide solid rib lines:
  • Mosaic tiles: 3mm x 3mm at 6mm centres
  • General wall tiles: 5mm x 5mm at 10mm centres
  • General floor tiles: 8mm x 8mm at 16 mm centres
  • For floors and external applications we advise to use the solid bed method. This involves applying a uniform bed of adhesive to the floor and “buttering” the back of the tile with the same adhesive. When the tiles are bedded with a twisting action, pressing firmly down it ensures 100% contact is made with both the floor and the tile.
  • When fitting tiles leave spaces between each of the tiles to allow for grouting (approx: walls 1mm – 3mm and floors 2mm – 12mm).
  • Before the tile adhesive sets clean off the excess adhesive from the face of the tile and grout joints with a clean damp cloth or sponge
  • Wall Tiling & Loadings
  • Wall types vary considerably but all have the same basic need to be structurally sound, strong, smooth and level. It is essential that the wall to be tiled has sufficient inherent strength to hold the proposed tile and the adhesive being used. The following chart lists maximum national standard loadings for a variety of wall substrates:
  • Loadings
  • Gypsum plaster 20kg/m2
  • Skimmed plasterboard (gypsum) 32kg/m2
  • Gypsum fibre boards 40kg/m2
  • Cement tile backer boards 40kg/m2
  • Glass reinforced cement sheets 50kg/m2
  • Cleaning
  • Tools should be thoroughly cleaned with water to remove excess material
  • immediately after use and before adhesive sets.
  • Grouting
  • Leave the installed tiles for a minimum period for at least 4 hours to set hard before grouting and/or walking on the tile. This time may be extended on impervious/non-porous substrates. It is also dependent on temperatures and conditions. Always check and ensure that adhesive has set hard before grouting.
  • Stroage
  • This product must be stored in unopened bags, clear of the ground in dry conditions. Avoid frost. Ideal storage temperatures are between 5 degree C and 25 degree C.
  • Shelf Life
  • Under the above storage conditions this product has a shelf life of 12 months.
  • Health & Safety
  • Please ensure that appropriate PPE is used when preparing, mixing and applying products. Always wash hands before consuming food and make sure that materials are kept safely out of reach of children and animals.
Frequently Bought Together:
You May Also Be Interested In:

Reviews & Ratings

Rate This Products:


Submit Your Review
Please enter your name
Please enter your city
Please enter your review title
Please enter your review
How Many Stars Would You Give for the Following?
Quality:  
Rate the product on quality
Value For Money:  
Rate the product on value for money
Style:  
Rate the product on style
Ask A Technical Question
Please enter your name
Please enter your valid email address
Please enter your question
Thank you for feedback We will soon verify the details and add your feedback appropriately.

Thank You For Your Rating

We will soon verify the details and add your rating appropriately.

Delivery & Returns

Thank you for answer feedback

Sorry for the inconvenience. Please try again at a later time.